Add Schema, Add Table into a SQL Test Database

email me

This is how you would create a schema and add a table into your own Test database.


Add-Type -Path 'C:\Program Files\Microsoft SQL Server\130\SDK\Assemblies\Microsoft.SqlServer.Smo.dll'

$ns = 'Microsoft.SqlServer.Management.Smo'
$svr = new-object ("$ns.Server") $inst

#Create reusable datatype objects
$dtint = [Microsoft.SqlServer.Management.Smo.Datatype]::Int
$dtvchar100 = [Microsoft.SqlServer.Management.Smo.Datatype]::NVarChar(100)
$dtdatetm = [Microsoft.SqlServer.Management.Smo.Datatype]::DateTime

#Reference the database.
$db = $svr.Databases["Test"]

#Schema variables
$SchemaName = "Inventory"
$Schema = $db.Schemas[$SchemaName]

#Ensure that the schema, if not, create it
if (!($Schema)) 
{
    Write-Host "Creating Schema: $SchemaName"
    $Schema = New-Object ('Microsoft.SqlServer.Management.SMO.Schema') ($db, $SchemaName)
    $Schema.Create()
}

#Create the table in the HumanResources schema
$tbcomp = new-object ("$ns.Table") ($db, "ComputerInfo", "Inventory")

#Create the ComputerID column
$colcoid = new-object ("$ns.Column") ($tbcomp, "ComputerID", $dtint)
$colcoid.Identity = $true
$colcoid.IdentitySeed = cls
$colcoid.IdentityIncrement = 1
$tbcomp.Columns.Add($colcoid)

#Create the ComputerName column
$colconame = new-object ("$ns.Column") ($tbcomp, "ComputerName", $dtvchar100)
$colconame.Nullable = $false
$tbcomp.Columns.Add($colconame)

#Create the AcquiredDate column
$colacqdate = new-object ("$ns.Column") ($tbcomp, "AcquiredDate", $dtdatetm)
$colacqdate.Nullable = $false
$tbcomp.Columns.Add($colacqdate)

#Create the Primary Key
$idxpkcomputer = new-object ("$ns.Index") ($tbcomp, "PK_AcquiredComputer")
$idxpkcomputer.IndexKeyType = "DriPrimaryKey"
$idxpkcomputer.IsClustered = $true
$idxpkcomputercol = new-object ("$ns.IndexedColumn") ($idxpkcomputer, "ComputerID")
$idxpkcomputer.IndexedColumns.Add($idxpkcomputercol)
$tbcomp.Indexes.Add($idxpkcomputer)
 
#Create the table
$tbcomp.Create()

Add New Table into AdventureWorks2016 Database

email me

This is how you would add a new table into a SQL database using PowerShell.

The idea is, if HR was to assign an employee a laptop, and then upon first login, the user info would be recorded into the database. You could extend this to record IP address, computer serial number, MAC addresses, etc.

Add-Type -Path 'C:\Program Files\Microsoft SQL Server\130\SDK\Assemblies\Microsoft.SqlServer.Smo.dll'

$ns = 'Microsoft.SqlServer.Management.Smo'
$svr = new-object ("$ns.Server") $inst

#Create reusable datatype objects
$dtint = [Microsoft.SqlServer.Management.Smo.Datatype]::Int
$dtvchar100 = [Microsoft.SqlServer.Management.Smo.Datatype]::NVarChar(100)
$dtdatetm = [Microsoft.SqlServer.Management.Smo.Datatype]::DateTime

#Reference the AdventureWorks database.
$db = $svr.Databases["AdventureWorks2016"]

#Create the table in the HumanResources schema
$tbcomp = new-object ("$ns.Table") ($db, "ComputerInfo", "HumanResources")

#Create the ComputerID column
$colcoid = new-object ("$ns.Column") ($tbcomp, "ComputerID", $dtint)
$colcoid.Identity = $true
$colcoid.IdentitySeed = cls
$colcoid.IdentityIncrement = 1
$tbcomp.Columns.Add($colcoid)

#Create the ComputerName column
$colconame = new-object ("$ns.Column") ($tbcomp, "ComputerName", $dtvchar100)
$colconame.Nullable = $false
$tbcomp.Columns.Add($colconame)

#Create the AcquiredDate column
$colacqdate = new-object ("$ns.Column") ($tbcomp, "AcquiredDate", $dtdatetm)
$colacqdate.Nullable = $false
$tbcomp.Columns.Add($colacqdate)

#Create the Primary Key
$idxpkcomputer = new-object ("$ns.Index") ($tbcomp, "PK_AcquiredComputer")
$idxpkcomputer.IndexKeyType = "DriPrimaryKey"
$idxpkcomputer.IsClustered = $true
$idxpkcomputercol = new-object ("$ns.IndexedColumn") ($idxpkcomputer, "ComputerID")
$idxpkcomputer.IndexedColumns.Add($idxpkcomputercol)
$tbcomp.Indexes.Add($idxpkcomputer)

#Create the table
$tbcomp.Create()

Windows 10 TPM and BitLocker

email me

It seems like with each release of Windows, Microsoft comes out with new and fun ways to stress out developers and sys admins. In Windows 10, many of the BitLocker commands that worked in Windows 7 no longer work (most of the PS cmdlets became available in Windows 8.1).

Classic Microsoft

Now, to come up with a complete enterprise solution (without purchasing MBAM-like products), you’ll have to string together a few different technologies and PowerShell commands.

So far, this is what I’ve come up with, which works to enable the TPM and start BitLocker. I have added popups, splash screens, and more complex code…but, have left that out this post, just for the sake of simplicity.
         

Two things you may have to do

(1) Enable TPM using Microsoft’s BitLocker Deployment Script.  Use this with the /on:tpm option.

(2) And, if you have newer HP computers, you’ll need to set the BIOS password before enabling the TPM. You can use the HP BIOS Configuration Utility to do this. I had no issues creating the encrypted password and setting the BIOS password.


What the commands and process look like

“C:\SetPW.exe” /npwdfile:”C:\password.bin”

“C:\enablebitlocker.vbs” /on:tpm /l:c:\bitlocker.log

{a reboot will be required}

{the BIOS PW was set – Press F1 to enable TPM}

C:\Windows\System32\WindowsPowerShell\v1.0\powershell.exe -Command “Initialize-Tpm -AllowClear -AllowPhysicalPresence”

C:\Windows\System32\WindowsPowerShell\v1.0\powershell.exe -Command “Initialize-Tpm

C:\windows\system32\manage-bde -protectors -add C: -tpm

C:\Windows\System32\WindowsPowerShell\v1.0\powershell.exe -Command “Enable-BitLocker -MountPoint “C:” -EncryptionMethod Aes256 -UsedSpaceOnly -RecoveryPasswordProtector”

C:\windows\system32\manage-bde.exe -protectors -adbackup c: -id {9557D616-0BD0-4B2A-8A2A-9DD4C5C21CCC}

{reboot to start encrypting}


Reference

https://blogs.technet.microsoft.com/heyscriptingguy/2015/05/25/powershell-and-bitlocker-part-1/

https://technet.microsoft.com/en-us/library/jj649829(v=wps.630).aspx


Notes

The get-tpm cmdlet in PowerShell – what a correctly setup TPM looks like


A drive that has been successfully encrypted using Bitlocker

PowerShell Function Comma List and Text File

email me

Function Get-CompSysInfo {
     param(
     [string[]]$ComputerName
)
     BEGIN {}
     PROCESS {
         if ($_ -ne $null) {
         $ComputerName = $_
         }
           
           #foreach used for comma list
           foreach ($computer in $ComputerName) {
            #returns info on computer - could be another wmi object     
            get-wmiobject -Class win32_computersystem -ComputerName $Computer |
               Select-Object -Property Name,Manufacturer,Model
          }
     }
     END {}
}

# from comma list
# Get-CompSystemInfo -ComputerName PC_1, PC_2, PC_3

# from text file
Get-Content C:\Computerlist.txt | Get-CompSysInfo

Windows 10 Cannot Enable PowerShell Scripting

email me

Something strange happened to me when I was working on some automation for Windows 10. No matter what I did, PowerShell scripting would not enable. See below.

Error

File C:\Setup\Test.ps1 cannot be loaded because the execution of scripts is disabled on this system. Please see “get- help about_signing” for more details. At line:1


Fix

Step 1
Open registry, Start > Run > Regedit

Step 2
Navigate to HKLM\SOFTWARE\Microsoft\PowerShell\1\ShellIds\Microsoft.PowerShell

Step 3
Create ExecutionPolicy as REG_SZ, with value RemoteSigned

Step 4
Open PowerShell and run Get-ExecutionPolicy to verify it is working


Notes

If you’re doing an upgrade, make sure you add the above reg key before upgrading.

PowerShell ByPass Execution Policy

email me

The Set-ExecutionPolicy cmdlet enables you to determine which Windows PowerShell scripts (if any) will be allowed to run on your computer. Windows PowerShell has four different execution policies:

  • Restricted – No scripts can be run. Windows PowerShell can be used only in interactive mode.
  • AllSigned – Only scripts signed by a trusted publisher can be run.
  • RemoteSigned – Downloaded scripts must be signed by a trusted publisher before they can be run.
  • Unrestricted – No restrictions; all Windows PowerShell scripts can be run.

But, automating certain sequences, you may not want to modify the current execution policy. To launch scripts in an elevated status, without changing the policy, you can run the following—which points to your script

powershell -ExecutionPolicy ByPass -File YourScript.ps1


Notes

Powershell.exe -ExecutionPolicy Bypass -NoLogo -NonInteractive -NoProfile -WindowStyle Hidden -File “YourScript.ps1”

Powershell -noprofile -executionpolicy bypass -file “YourScript.ps1”

Create Windows 10 Profiles from Default Profile

email me

You used to have the ability to copy/paste a reference user profile into the C:\Users\Default folder, and all the profile settings could be applied to a new user when they first logged in. This process doesn’t quite work anymore, but…still, I wanted to try it.


DISCLAIMER

This method was for testing only…and is not recommended for the enterprise.

Since Windows 8, Microsoft now uses unique file association hashes in the registry, known as UserChoice, as well as a tile database for the Start Menu. If you copy a profile using the old Windows 7 method, all kinds of anomalous things transpire, like broken app associations, and busted, non-functional Start Menus. 


moving on…


Log into the Admin profile. Launch the User account console. Enable the disabled Default user account.


Create a new user.


Name that user Reference — to be used as our reference profile


Set password.


Create a new user. User1 will be our test user, to make sure the Default profile is working properly.


Make sure ‘Show hidden files, folders, and drives’ is enabled in the File Explorer Options.


Next, right click on the Reference profile > Properties > Security > Advanced. You’re going to change the owner from SYSTEM to everyone.


Select the Replace all child objects…


Now log into the Reference Profile


By default, Microsoft includes a ton of bloatware you don’t want. See picture.
Configure all settings, wallpaper, themes, and the menu layout. Log out.


Log back into the Admin profile. Go to C:\Users\Reference — Cut the contents.


Paste the contents into the Default profile


To test, log into the User1 profile. A new user profile will be generated from the Default profile.


All the settings and layout have been successfully created in the User1 profile. Click pic to zoom.


Notes

If you have problems, look into the C:\Users\Default\AppData\Local\Microsoft\Windows folder. There is a chance that certain settings and configs may lockup the profile…or cause other anomalies like Taskbar loading issues, Tiles not working right, or applications not loading from Start Menu.

There are also plenty of things to explore for in the Microsoft\Windows folder. For example, WinX is where Microsoft keeps the Win-X pop up menu when you right click on the Start Button: In that folder is a Group 1, Group 2, and Group 3 folder—they contain shortcuts. There are registry methods for making custom changed, or…just use this Win-X toolmirror.


Customization Links

How to Create Hardware Independent System Image for Installing Windows 10

How to Add or Remove Programs from Win+X Menu in Windows 10

Customize Windows 10 Start with Group Policy

Customizing the Windows 10 Start Menu and add IE Shortcut during OSD

How to Add or Remove Programs from Win+X Menu in Windows 10

Customizing the Taskbar in Windows 10 during OSD

Custom Start Menu in Windows 10

email me

To customize the Start Menu in your images, you need to export a ‘reference’ Start Menu using the Export-StartLayout PowerShell cmdlet.

Export Command
Use a computer, setup the Start Menu exactly the way you want it, and then export the layout.

Export-StartLayout –path C:\LayoutModification.xml


Import Command 
Now, in your imaging process, you can use the following PowerShell command to import the custom XML into the Default profile….before sysprep.

Import-StartLayout -LayoutPath c:\LayoutModification.xml -MountPath $env:SystemDrive\


Copy Command
If for some reason you have problems with that, you can just add a low level copy either before sysprep or in post setup. Note, I used the ‘Default’ path so the customized XML will be used when a new profile is generated.

copy /y c:\LayoutModification.xml “C:\Users\Default\AppData\Local\Microsoft\Windows\Shell”

Removing Windows 10 Native Shortcuts from All apps

email me

The Windows 10 Start Menu has changed a bit. If you haven’t noticed yet, you can’t exactly remove the Windows 10 built-in applications; this is by design.

You can still move application shortcuts around, but it no longer seems possible to remove native ones from the Start Menu. It is also not possible to move those apps in a folder to make room for desktop programs.

The Start Menu itself does not offer any options, but there are a couple workarounds.


Method 1 

  1. The application shortcuts listed under C:\Users\%username%\AppData\Local\Microsoft\Windows\Application Shortcuts\
  2. To display that folder in File Explorer, make sure you enable the display of hidden files and folders with a click on View > Hidden Items.
  3. The folder lists all installed applications. Example: Microsoft.3DBuilder_8wekyb3d8bbwe
  4. Create a new folder in there and call it Apps.
  5. Move all applications that you don’t want to see in the Start Menu’s all apps listings root into the Apps.


Method 2 (I used this one)

If the shortcut still appears on the Start Menu after a reboot, try this from an admin PowerShell Prompt:

Get-AppxPackage *3dbuilder* | Remove-AppxPackage


from PowerShell


Others

Uninstall Alarms and Clock:
Get-AppxPackage *windowsalarms* | Remove-AppxPackage

Uninstall Calculator:
Get-AppxPackage *windowscalculator* | Remove-AppxPackage

Uninstall Calendar and Mail:
Get-AppxPackage *windowscommunicationsapps* | Remove-AppxPackage

Uninstall Camera:
Get-AppxPackage *windowscamera* | Remove-AppxPackage

Uninstall Get Office:
Get-AppxPackage *officehub* | Remove-AppxPackage

Uninstall Get Skype:
Get-AppxPackage *skypeapp* | Remove-AppxPackage

Uninstall Get Started:
Get-AppxPackage *getstarted* | Remove-AppxPackage

Uninstall Groove Music:
Get-AppxPackage *zunemusic* | Remove-AppxPackage

Uninstall Maps:
Get-AppxPackage *windowsmaps* | Remove-AppxPackage

Uninstall Microsoft Solitaire Collection:
Get-AppxPackage *solitairecollection* | Remove-AppxPackage

Uninstall Money:
Get-AppxPackage *bingfinance* | Remove-AppxPackage

Uninstall Movies & TV:
Get-AppxPackage *zunevideo* | Remove-AppxPackage

Uninstall News:
Get-AppxPackage *bingnews* | Remove-AppxPackage

Uninstall OneNote:
Get-AppxPackage *onenote* | Remove-AppxPackage

Uninstall People:
Get-AppxPackage *people* | Remove-AppxPackage

Uninstall Phone Companion:
Get-AppxPackage *windowsphone* | Remove-AppxPackage

Uninstall Photos:
Get-AppxPackage *photos* | Remove-AppxPackage

Uninstall Store:
Get-AppxPackage *windowsstore* | Remove-AppxPackage

Uninstall Sports:
Get-AppxPackage *bingsports* | Remove-AppxPackage

Uninstall Voice Recorder:
Get-AppxPackage *soundrecorder* | Remove-AppxPackage

Uninstall Weather:
Get-AppxPackage *bingweather* | Remove-AppxPackage

Uninstall Xbox:
Get-AppxPackage *xboxapp* | Remove-AppxPackage


Potential Issue with PowerShell

Now, although the “short” package name should work with the cmdlet, in some cases it will not (especially if elevated access is required). So, to create a startup script that will remove shortcuts for the Current User, use this with the full package name.

Remove-Appxpackage -package Microsoft.SkypeApp_3.2.1.0_x86__kzf8qxf38zg5c
Remove-Appxpackage -package Windows.ContactSupport_10.0.10240.16384_neutral_neutral_cw5n1h2txyewy
Remove-Appxpackage -package Microsoft.XboxGameCallableUI_1000.10240.16384.0_neutral_neutral_cw5n1h2txyewy
Remove-Appxpackage -package Microsoft.XboxIdentityProvider_1000.10240.16384.0_neutral_neutral_cw5n1h2txyewy
Remove-Appxpackage -package Microsoft.Windows.Photos_15.618.18170.0_x64__8wekyb3d8bbwe
Remove-Appxpackage -package Microsoft.Getstarted_2.1.9.0_x64__8wekyb3d8bbwe
Remove-Appxpackage -package Microsoft.BingWeather_4.3.193.0_x86__8wekyb3d8bbwe
Remove-Appxpackage -package Microsoft.People_1.10159.0.0_x64__8wekyb3d8bbwe
Remove-Appxpackage -package Microsoft.MicrosoftSolitaireCollection_3.1.6103.0_x64__8wekyb3d8bbwe
Remove-Appxpackage -package Microsoft.BingSports_4.3.193.0_x86__8wekyb3d8bbwe
Remove-Appxpackage -package Microsoft.WindowsAlarms_10.1512.28020.0_x64__8wekyb3d8bbwe
Remove-Appxpackage -package Microsoft.WindowsPhone_10.1602.3010.0_x64__8wekyb3d8bbwe
Remove-Appxpackage -package Microsoft.3DBuilder_10.9.6.0_x64__8wekyb3d8bbwe
Remove-Appxpackage -package Microsoft.ZuneMusic_3.6.15131.0_x64__8wekyb3d8bbwe
Remove-Appxpackage -package Microsoft.BingNews_4.9.51.0_x86__8wekyb3d8bbwe
Remove-Appxpackage -package Microsoft.BingFinance_4.9.51.0_x86__8wekyb3d8bbwe
Remove-Appxpackage -package Microsoft.WindowsStore_11602.1.26.0_x64__8wekyb3d8bbwe
Remove-Appxpackage -package Microsoft.XboxApp_15.17.3003.0_x64__8wekyb3d8bbwe
Remove-Appxpackage -package Microsoft.WindowsMaps_4.1603.1190.0_x64__8wekyb3d8bbwe
Remove-Appxpackage -package Microsoft.MicrosoftOfficeHub_17.7012.23531.0_x64__8wekyb3d8bbwe
Remove-Appxpackage -package Microsoft.Office.OneNote_17.6965.57691.0_x64__8wekyb3d8bbw
Remove-Appxpackage -package Microsoft.ZuneVideo_3.6.19761.0_x64__8wekyb3d8bbwe
exit-pssession

Others

microsoft.windowscommunicationsapps_17.6568.46361.0_x64__8wekyb3d8bbwe
Microsoft.NET.Native.Runtime.1.3_1.3.23901.0_x64__8wekyb3d8bbwe
Microsoft.NET.Native.Runtime.1.3_1.3.23901.0_x86__8wekyb3d8bbwe
Microsoft.NET.Native.Framework.1.3_1.3.23901.0_x64__8wekyb3d8bbwe
Microsoft.NET.Native.Framework.1.3_8wekyb3d8bbwe
Microsoft.WindowsSoundRecorder_10.1512.21110.0_x64__8wekyb3d8bbwe
Microsoft.NET.Native.Runtime.1.1_1.1.23406.0_x86__8wekyb3d8bbwe
Microsoft.NET.Native.Runtime.1.1_1.1.23406.0_x64__8wekyb3d8bbwe
Microsoft.NET.Native.Framework.1.1_1.0.23115.0_x86__8wekyb3d8bbwe
Microsoft.NET.Native.Framework.1.1_1.0.23115.0_x64__8wekyb3d8bbwe
Microsoft.VCLibs.140.00_14.0.23816.0_x64__8wekyb3d8bbwe
Microsoft.WindowsCalculator_10.1601.19020.0_x64__8wekyb3d8bbwe
Microsoft.VCLibs.140.00_14.0.23816.0_x86__8wekyb3d8bbwe
Microsoft.Appconnector_1.3.3.0_neutral__8wekyb3d8bbwe
windows.devicesflow_6.2.0.0_neutral_neutral_cw5n1h2txyewy
Microsoft.WindowsCamera_5.38.3003.0_x64__8wekyb3d8bbwe
Microsoft.NET.Native.Runtime.1.0_1.0.22929.0_x64__8wekyb3d8bbwe
Microsoft.NET.Native.Runtime.1.0_1.0.22929.0_x86__8wekyb3d8bbwe
Microsoft.NET.Native.Framework.1.0_1.0.22929.0_x64__8wekyb3d8bbwe
Microsoft.NET.Native.Framework.1.0_1.0.22929.0_x86__8wekyb3d8bbwe
Windows.PurchaseDialog_6.2.0.0_neutral_neutral_cw5n1h2txyewy
Windows.PrintDialog_6.2.0.0_neutral_neutral_cw5n1h2txyewy
Windows.MiracastView_6.3.0.0_neutral_neutral_cw5n1h2txyewy
windows.immersivecontrolpanel_6.2.0.0_neutral_neutral_cw5n1h2txyewy
Microsoft.Windows.CloudExperienceHost_10.0.10240.16384_neutral_neutral_cw5n1h2txyewy
Microsoft.Windows.CloudExperienceHost_cw5n1h2txyewy
Microsoft.AAD.BrokerPlugin_1000.10240.16384.0_neutral_neutral_cw5n1h2txyewy
Microsoft.AccountsControl_10.0.10240.16384_neutral__cw5n1h2txyewy
Microsoft.BioEnrollment_10.0.10240.16384_neutral__cw5n1h2txyewy
Microsoft.LockApp_10.0.10240.16384_neutral__cw5n1h2txyewy
Microsoft.Windows.AssignedAccessLockApp_1000.10240.16384.0_neutral_neutral_cw5n1h2txyewy
Microsoft.Windows.AssignedAccessLockApp_cw5n1h2txyewy
Microsoft.Windows.ContentDeliveryManager_10.0.10240.16384_neutral_neutral_cw5n1h2txyewy
Microsoft.Windows.ContentDeliveryManager_cw5n1h2txyewy
Microsoft.Windows.Cortana_1.4.8.152_neutral_neutral_cw5n1h2txyewy
Microsoft.Windows.ParentalControls_1000.10240.16384.0_neutral_neutral_cw5n1h2txyewy
Microsoft.Windows.ShellExperienceHost_10.0.10240.16384_neutral_neutral_cw5n1h2txyewy
Microsoft.WindowsFeedback_10.0.10240.16384_neutral_neutral_cw5n1h2txyewy


Notes

C:\Users\%username%\AppData\Local\Packages
C:\Users\%username%\AppData\Local\Microsoft\Windows\Application Shortcuts
C:\Users\%username%\AppData\Local\TileDataLayer\Database
C:\Users\Default\AppData\Local\Microsoft\Windows\Shell
C:\Users\%username%\AppData\Local\Microsoft\Windows\Shell

Windows 10 Start Menu Broken
Get-AppXPackage -AllUsers | Foreach {Add-AppxPackage -DisableDevelopmentMode -Register “$($_.InstallLocation)\AppXManifest.xml”}

Export Layout
export-startlayout –path C:\LayoutModification.xml

Import Layout (can be applied via PS or GP)
Import-StartLayout -LayoutPath LayoutModification.xml -MountPath $en
v:SystemDrive\

For New Profile Generation
copy /y LayoutModification.xml “C:\Users\Default\AppData\Local\Microsoft\Windows\Shell”

Remove Windows 10 Built-in Apps

email me

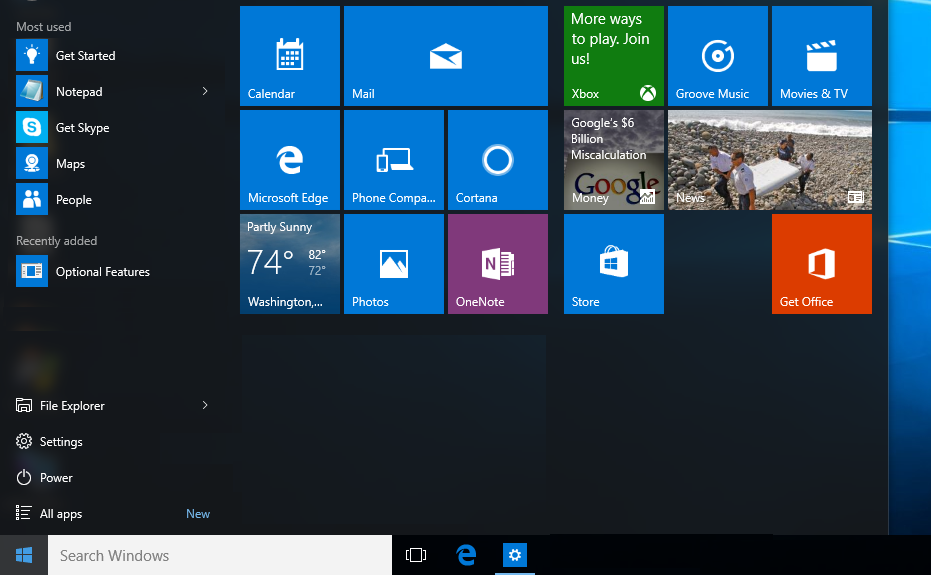
Something really annoying…is how Microsoft bundles bloatware applications into Windows 10. These are especially irritating when deploying the OS out to enterprise users. The last thing you want is end-users clicking on the Microsoft Store, playing with XBox, and messing around with the other numerous non-business applications. To remove these, run the below PowerShell script as part of post setup.

A couple caveats, (1) many of these apps are setup upon new profile creation, meaning the script needs to be a part of the Default user profile, or executed after the user logs in; (2) not all apps can be removed using the PowerShell script.

Note, be prepared to continue seeing Cortana Search, Microsoft Edge, Contact Support, and Windows Feedback…as these cannot be removed with PowerShell. See my Experimental section for these apps.

Import-Module -DisableNameChecking $PSScriptRoot\..\lib\take-own.psm1

Get-AppXPackage -AllUsers | Foreach {Add-AppxPackage -DisableDevelopmentMode -Register "$($_.InstallLocation)\AppXManifest.xml"}

echo "Elevating priviledges for this process"
do {} until (Elevate-Privileges SeTakeOwnershipPrivilege)

echo "Uninstalling default apps"
$apps = @(
# default Windows 10 apps
"Microsoft.Getstarted"
"Microsoft.Office.Sway"
"Microsoft.WindowsMaps"
"Microsoft.People"
"Microsoft.WindowsAlarms"
"Microsoft.3DBuilder"
"Microsoft.MicrosoftOfficeHub"
"Microsoft.ZuneMusic"
"Microsoft.ZuneVideo"
"Microsoft.SkypeApp"
"Microsoft.BingFinance"
"Microsoft.BingNews"
"Microsoft.BingSports"
"Microsoft.BingWeather"
"Microsoft.MicrosoftSolitaireCollection"
"Microsoft.XboxApp"
"Microsoft.MinecraftUWP"
"Microsoft.WindowsPhone"
"microsoft.windowscommunicationsapps"
"Microsoft.CommsPhone"
"Microsoft.ConnectivityStore"
"Microsoft.Messaging"
"9E2F88E3.Twitter"
"Flipboard.Flipboard"
"ShazamEntertainmentLtd.Shazam"
"king.com.CandyCrushSaga"
"ClearChannelRadioDigital.iHeartRadio"
"Microsoft.Appconnector"
"Microsoft.Office.OneNote"

#"Microsoft.Windows.Photos"
#"Microsoft.WindowsCalculator"
#"Microsoft.WindowsCamera"
#"Microsoft.WindowsSoundRecorder"
#"Microsoft.WindowsStore"

# apps which cannot be removed using Remove-AppxPackage
#"Microsoft.BioEnrollment"
#"Microsoft.MicrosoftEdge"
#"Microsoft.Windows.Cortana"
#"Microsoft.WindowsFeedback"
#"Microsoft.XboxGameCallableUI"
#"Microsoft.XboxIdentityProvider"
#"Windows.ContactSupport"
)

foreach ($app in $apps) {
Get-AppxPackage -Name $app -AllUsers | Remove-AppxPackage

Get-AppXProvisionedPackage -Online |
where DisplayName -EQ $app |
Remove-AppxProvisionedPackage -Online
}


Of course, not everything can be uninstalled in this manner. For the more difficult apps, use the install_wim_tweak.exe utility and this code (this tool was created by Legolash2o)

“%Temp%\TweakUtil.exe” /o /l
“%Temp%\TweakUtil.exe” /o /c Microsoft-Windows-InsiderHub /r
“%Temp%\TweakUtil.exe” /h /o /l

“%Temp%\TweakUtil.exe” /o /l
“%Temp%\TweakUtil.exe” /o /c Microsoft-Windows-ContactSupport /r
“%Temp%\TweakUtil.exe” /h /o /l

Not recommended for removal
“%Temp%\TweakUtil.exe” /o /l

“%Temp%\TweakUtil.exe” /o /c Microsoft-Windows-Store /r /r
“%Temp%\TweakUtil.exe” /h /o /l


Other TweakUtil Uninstalls

install_wim_tweak.exe /o /c Microsoft-Windows-Cortana /r

install_wim_tweak.exe /o /c “Microsoft-Windows-MediaViewer-Package~31bf3856ad364e35~amd64~~6.3.9600.16384” /r

install_wim_tweak.exe /o /c “Microsoft-Windows-MediaViewer-Package~31bf3856ad364e35~amd64~en-US~6.3.9600.16384” /r

install_wim_tweak.exe /o /c “Microsoft-Windows-Camera-Package” /r

install_wim_tweak.exe /o /c “Microsoft-Windows-WebcamExperience-Package” /r

install_wim_tweak.exe /o /c “Microsoft-Windows-FileManager-Package~31bf3856ad364e35~amd64~~6.3.9600.16384” /r

install_wim_tweak.exe /o /c “Microsoft-Windows-FileManager-Package~31bf3856ad364e35~amd64~en-US~6.3.9600.16384” /r

install_wim_tweak.exe /o /c “Microsoft-Windows-Store-Client-Package~31bf3856ad364e35~amd64~~6.3.9600.16384” /r

install_wim_tweak.exe /o /c “Microsoft-Windows-Store-Client-Package~31bf3856ad364e35~amd64~en-US~6.3.9600.16384” /r

install_wim_tweak.exe /o /c “Checkpoint-VpnPlugin-Package~31bf3856ad364e35~amd64~~6.3.9600.16384” /r

install_wim_tweak.exe /o /c “Checkpoint-VpnPlugin-Package~31bf3856ad364e35~amd64~en-US~6.3.9600.16384” /r

install_wim_tweak.exe /o /c “F5-VpnPlugin-Package~31bf3856ad364e35~amd64~~6.3.9600.16384” /r

install_wim_tweak.exe /o /c “F5-VpnPlugin-Package~31bf3856ad364e35~amd64~en-US~6.3.9600.16384” /r

install_wim_tweak.exe /o /c “Juniper-VpnPlugin-Package~31bf3856ad364e35~amd64~~6.3.9600.16384” /r

install_wim_tweak.exe /o /c “Juniper-VpnPlugin-Package~31bf3856ad364e35~amd64~en-US~6.3.9600.16384” /r

install_wim_tweak.exe /o /c “Microsoft-Windows-VpnPlugins-Package~31bf3856ad364e35~amd64~~6.3.9600.16384” /r

install_wim_tweak.exe /o /c “Microsoft-Windows-VpnPlugins-Package~31bf3856ad364e35~amd64~en-US~6.3.9600.16384” /r

install_wim_tweak.exe /o /c “SonicWALL-VpnPlugin-Package~31bf3856ad364e35~amd64~~6.3.9600.16384” /r

install_wim_tweak.exe /o /c “SonicWALL-VpnPlugin-Package~31bf3856ad364e35~amd64~en-US~6.3.9600.16384” /r


Direct Image Mods

You may not want to do any of this in post setup; perhaps you want to make changes directly to the install.wim. In that case, use the below commands to modify the wim directly.

dism /image:D:\Win10\ISO\YourWIM /remove-provisionedappxpackage /packagename:Microsoft.3DBuilder_2015.624.2254.0_neutral_~_8wekyb3d8bbwedism

dism /image:D:\Win10\ISO\YourWIM /remove-provisionedappxpackage
/packagename:Microsoft.BingFinance_10004.3.193.0_neutral_~_8wekyb3d8bbwe

dism /image:D:\Win10\ISO\YourWIM /remove-provisionedappxpackage /packagename:Microsoft.BingNews_10004.3.193.0_neutral_~_8wekyb3d8bbwe

dism /image:D:\Win10\ISO\YourWIM /remove-provisionedappxpackage /packagename:Microsoft.BingSports_10004.3.193.0_neutral_~_8wekyb3d8bbwe

dism /image:D:\Win10\ISO\YourWIM /remove-provisionedappxpackage /packagename:Microsoft.BingWeather_10004.3.193.0_neutral_~_8wekyb3d8bbwe

dism /image:D:\Win10\ISO\YourWIM /remove-provisionedappxpackage /packagename:Microsoft.Getstarted_2015.622.1108.0_neutral_~_8wekyb3d8bbwe

dism /image:D:\Win10\ISO\YourWIM /remove-provisionedappxpackage /packagename:Microsoft.MicrosoftOfficeHub_2015.4218.23751.0_neutral_~_8wekyb3d8bbwe

dism /image:D:\Win10\ISO\YourWIM /remove-provisionedappxpackage /packagename:Microsoft.MicrosoftSolitaireCollection_3.1.6103.0_neutral_~_8wekyb3d8bbwe

dism /image:D:\Win10\ISO\YourWIM /remove-provisionedappxpackage /packagename:Microsoft.Office.OneNote_2015.4201.10091.0_neutral_~_8wekyb3d8bbwe

dism /image:D:\Win10\ISO\YourWIM /remove-provisionedappxpackage /packagename:Microsoft.People_2015.627.626.0_neutral_~_8wekyb3d8bbwe

dism /image:D:\Win10\ISO\YourWIM /remove-provisionedappxpackage /packagename:Microsoft.SkypeApp_3.2.1.0_neutral_~_kzf8qxf38zg5c

dism /image:D:\Win10\ISO\YourWIM /remove-provisionedappxpackage /packagename:Microsoft.Windows.Photos_2015.618.1921.0_neutral_~_8wekyb3d8bbwe

dism /image:D:\Win10\ISO\YourWIM /remove-provisionedappxpackage /packagename:Microsoft.windowscommunicationsapps_2015.6002.42251.0_neutral_~_8wekyb3d8bbwe

dism /image:D:\Win10\ISO\YourWIM /remove-provisionedappxpackage /packagename:Microsoft.WindowsMaps_2015.619.213.0_neutral_~_8wekyb3d8bbwe

dism /image:D:\Win10\ISO\YourWIM /remove-provisionedappxpackage /packagename:Microsoft.WindowsPhone_2015.620.10.0_neutral_~_8wekyb3d8bbwe

dism /image:D:\Win10\ISO\YourWIM /remove-provisionedappxpackage /packagename:Microsoft.WindowsStore_2015.701.14.0_neutral_~_8wekyb3d8bbwe

dism /image:D:\Win10\ISO\YourWIM /remove-provisionedappxpackage /packagename:Microsoft.XboxApp_2015.617.130.0_neutral_~_8wekyb3d8bbwe

dism /image:D:\Win10\ISO\YourWIM /remove-provisionedappxpackage /packagename:Microsoft.ZuneMusic_2019.6.10841.0_neutral_~_8wekyb3d8bbwe

dism /image:D:\Win10\ISO\YourWIM /remove-provisionedappxpackage /packagename:Microsoft.ZuneVideo_2019.6.10811.0_neutral_~_8wekyb3d8bbwe


Experimental

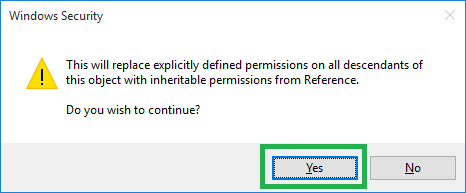
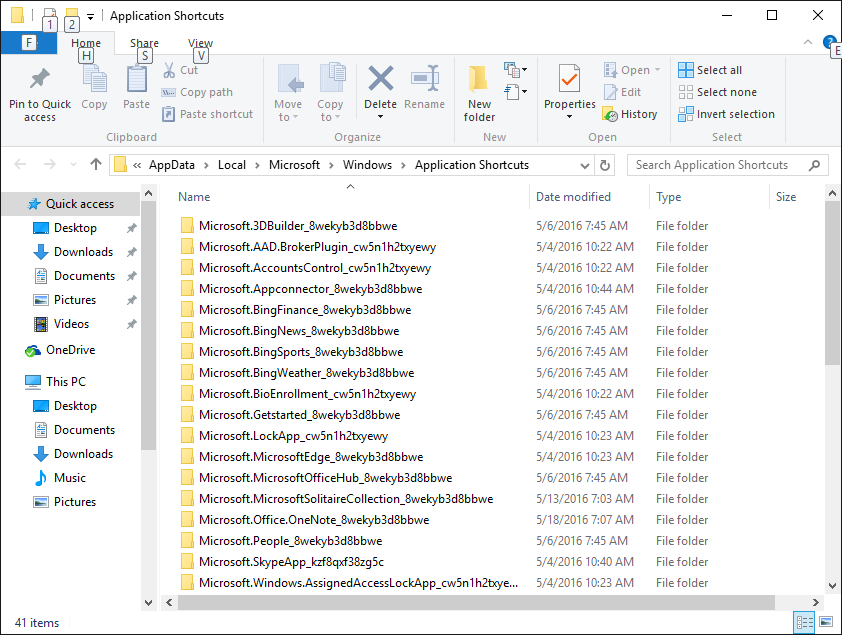
Moving folders from these locations supposedly removes ‘functionality’ of shortcuts on Start Menu (this did not work for me). Note, four apps on the Start Menu will cause you to pull your hair out: Cortana Search, Microsoft Edge, Contact Support, and Windows Feedback.


My experience with trying to remove Contact Support (it failed)

Python Silent Installs

email me

Depending on whether you download the MSI or EXE type, this is how you would silently install Python.

MSI

%windir%\system32\msiexec.exe /i “%CD%\python-2.7.11.msi” /qn /norestart


EXE

“%CD%\python-3.5.1.exe” /quiet InstallAllUsers=1 PrependPath=1 Include_test=0 TargetDir=c:\Python351

{updated}

“%CD%\python-3.7.0.exe” /quiet InstallAllUsers=1 PrependPath=1 Include_test=0


Notes

Python Releases for Windows

Using Python on Windows


Packaging

I packaged to a deployable EXE using ExeScript. You can also use a self-extracting WinRar EXE.


All of the options available in the installer UI can also be specified from the command line, allowing scripted installers to replicate an installation on many machines without user interaction. These options may also be set without suppressing the UI in order to change some of the defaults.

To completely hide the installer UI and install Python silently, pass the /quiet option. To skip past the user interaction but still display progress and errors, pass the /passive option. The /uninstall option may be passed to immediately begin removing Python – no prompt will be displayed.

All other options are passed as name=value, where the value is usually 0 to disable a feature, 1 to enable a feature, or a path. The full list of available options is shown below.

Name Description Default
InstallAllUsers Perform a system-wide installation. 0
TargetDir The installation directory Selected based on InstallAllUsers
DefaultAllUsersTargetDir The default installation directory for all-user installs %ProgramFiles%\Python X.Y or%ProgramFiles(x86)%\Python X.Y
DefaultJustForMeTargetDir The default install directory for just-for-me installs %LocalAppData%\Programs\PythonXY or%LocalAppData%\Programs\PythonXY-32
DefaultCustomTargetDir The default custom install directory displayed in the UI (empty)
AssociateFiles Create file associations if the launcher is also installed. 1
CompileAll Compile all .py files to .pyc. 0
PrependPath Add install and Scripts directories tho PATH and .PY to PATHEXT 0
Shortcuts Create shortcuts for the interpreter, documentation and IDLE if installed. 1
Include_doc Install Python manual 1
Include_debug Install debug binaries 0
Include_dev Install developer headers and libraries 1
Include_exe Install python.exe and related files 1
Include_launcher Install Python Launcher for Windows. 1
InstallLauncherAllUsers Installs Python Launcher for Windows for all users. 1
Include_lib Install standard library and extension modules 1
Include_pip Install bundled pip and setuptools 1
Include_symbols Install debugging symbols (*.pdb) 0
Include_tcltk Install Tcl/Tk support and IDLE 1
Include_test Install standard library test suite 1
Include_tools Install utility scripts 1
LauncherOnly Only installs the launcher. This will override most other options. 0
SimpleInstall Disable most install UI 0
SimpleInstallDescription A custom message to display when the simplified install UI is used. (empty)

For example, to silently install a default, system-wide Python installation, you could use the following command (from an elevated command prompt):

python-3.5.0.exe /quiet InstallAllUsers=1 PrependPath=1 Include_test=0

To allow users to easily install a personal copy of Python without the test suite, you could provide a shortcut with the following command. This will display a simplified initial page and disallow customization:

python-3.5.0.exe InstallAllUsers=0 Include_launcher=0 Include_test=0
    SimpleInstall=1 SimpleInstallDescription="Just for me, no test suite."