AI – C# – Chatbot With Built-in Responses

email me

This is a simple chatbot with built-in responses, internal to the program. You will build its responses by adding more case statements. Tested in Visual Studio 2017.

using System;
using System.Threading;

namespace ChatterBot
{
class Program
{
static void Main(string[] args)
{
bool shutdown = false;
bool foundResponse;
string inputValue;
string outputValue = "";
string ai_Name = "Hal";

Console.WriteLine(ai_Name + ": Hello");

while (!shutdown)
{
foundResponse = false;
Console.Write("User: ");
inputValue = Console.ReadLine().ToLower();

Console.Write(ai_Name + ": ");

// response data
switch (inputValue)
{
case "hello":
outputValue = "Hello to you! How are you?";
foundResponse = true;
break;
case "hi":
outputValue = "Hi to you! How are you?";
foundResponse = true;
break;
case "yo":
outputValue = "Yoooo to you! How are you?";
foundResponse = true;
break;
case "i'm good":
outputValue = "That's great. What's new?";
foundResponse = true;
break;
case "i am good":
outputValue = "That's great. What's new?";
foundResponse = true;
break;
case "exit":
Console.WriteLine("Good bye");
Thread.Sleep(3000);
//Console.ReadKey();
Environment.Exit(0);
break;
}

// if response is found
if (foundResponse)
{
Console.WriteLine(outputValue);
}
// if response is not found
else
{
Console.WriteLine("I do not understand. Can you please rephrase it?");
}

}
}
}
}

Notes

An even better approach would be to read a static (flat) text file. The text file would contain all your data. For example, the format of the text file would be: input, output—or, user_input, computer_response.

Once you’ve mastered that, move on to parsing user input into nouns and verbs, expanding contracted words, and providing timestamps to user input.

C# – Run Application

email me

These are two ways to use the Process class to launch an EXE. Both were tested in Visual Studio 2017.

Simplest usage—just launch an EXE.

using System.Diagnostics;

class Program
{
static void Main()
{
// Add your app name here
Process.Start(@"C:\Windows\system32\notepad.exe");
}
}


Intermediate usage—launch an EXE with credentials using SecureString

using System.Diagnostics;
using System.Security;

class Program
{
static void Main(string[] args)
{

SecureString strPassword = new SecureString();
// password by character
// it is important to use AppendChar
strPassword.AppendChar('P');
strPassword.AppendChar('a');
strPassword.AppendChar('s');
strPassword.AppendChar('w');
strPassword.AppendChar('o');
strPassword.AppendChar('r');
strPassword.AppendChar('d');

Process objProcess = new Process();
objProcess.StartInfo.LoadUserProfile = false;
objProcess.StartInfo.UseShellExecute = false;
objProcess.StartInfo.CreateNoWindow = false;

// enter the app path here
objProcess.StartInfo.WorkingDirectory = @"C:\Windows\system32";

// enter the app name here
objProcess.StartInfo.FileName = "notepad.exe";

// domain name
objProcess.StartInfo.Domain = ".";

// user account
objProcess.StartInfo.UserName = "administrator";
objProcess.StartInfo.Password = strPassword;
objProcess.Start();

}
}


Notes

Process Class  SecureString  AppendChar

Inheritance: Object  > MarshalByRefObject  > Component  > Process


Windows – Disable Print Screen – Disable Save to OneDrive

email me

Disable Print Screen

The following are the steps to disable print screen. You may want to do this for security purposes.

  1. Click Start, click Run, type “regedt32” (without the quotation marks), and then click OK.
  2. On the Windows menu, click “HKEY_LOCAL_ MACHINE on Local Machine”.
  3. Click the System\CurrentControlSet\Control folder, and then double-click the Keyboard Layout folder.
  4. On the Edit menu, click Add Value, type in “Scancode Map” (without the quotation marks), click REG_BINARY as the Data Type, and then click OK.
  5. Type “0000000000000000040000002AE037E0000037E00000540000000000” (without the quotation marks) in the Data field, and then click OK.
  6. Close the Registry Editor and restart the computer.


To disable saving to OneDrive

  1. Locate the OneDrive icon in the Windows 10 System Tray, right-click on it and choose Settings.
  2. Flip to the Auto save tab and uncheck the box to disable Automatically save screenshots I capture to OneDrive.
  3. Tap or click OK to save the setting.

PowerShell – GUI, Forms, Labels, Text, Input, Image, Icon

email me

This is simple ping utility that will demonstrate some of PowerShell’s form capabilities, which are fairly easy to implement, once you know how to do it.

This will create a basic form (a canvas for you to add items to). In the example, I have included labels, an input box, a background image, a button, an action to a button, title bar icon, etc. No extra tools or software are necessary; I created this in the PowerShell ISE (you could even use notepad).

Check out this training video at Channel 9, if you want to learn more: Link

I’ve made Part II, which is built upon Part I, a Microsoft page: Link, or this pdf, if the MS page goes missing.


Screenshots


Code

[void] [System.Reflection.Assembly]::LoadWithPartialName("System.Windows.Forms")
[void] [System.Reflection.Assembly]::LoadWithPartialName("System.Drawing")

# form specs
$objForm = New-Object System.Windows.Forms.Form
$objForm.Text = "Check Network Status"
$objForm.Size = New-Object System.Drawing.Size(300,170)
$objForm.StartPosition = "CenterScreen"
$objForm.KeyPreview = $True
$objForm.MaximumSize = $objForm.Size
$objForm.MinimumSize = $objForm.Size

# form icon
$objIcon = New-Object system.drawing.icon ("C:\Windows\Installer\{FFD1F7F1-1AC9-4BC4-A908-0686D635ABAF}\installer.ico")
$objForm.Icon = $objIcon

$objImage = [system.drawing.image]::FromFile("c:\setup\psform_background.jpg")
$objForm.BackgroundImage = $objImage
$objForm.BackgroundImageLayout = "None"
# None, Tile, Center, Stretch, Zoom

$objForm.Width = $objImage.Width
$objForm.Height = $objImage.Height

# label
$objLabel = New-Object System.Windows.Forms.label
$objLabel.Location = New-Object System.Drawing.Size(7,10)
$objLabel.Size = New-Object System.Drawing.Size(130,15)
$objLabel.BackColor = "Transparent"
$objLabel.ForeColor = "yellow"
$objLabel.Text = "Enter Computer Name"
$objForm.Controls.Add($objLabel)

# input box
$objTextbox = New-Object System.Windows.Forms.TextBox
$objTextbox.Location = New-Object System.Drawing.Size(10,45)
$objTextbox.Size = New-Object System.Drawing.Size(120,20)
$objForm.Controls.Add($objTextbox)

# ok button
$objButton = New-Object System.Windows.Forms.Button
$objButton.Location = New-Object System.Drawing.Size(140,44)
$objButton.Size = New-Object System.Drawing.Size(75,23)
$objButton.Text = "OK"
$objButton.Add_Click($button_click)
$objForm.Controls.Add($objButton)

# return status
$returnStatus = New-Object System.Windows.Forms.label
$returnStatus.Location = New-Object System.Drawing.Size(8,70)
$returnStatus.Size = New-Object System.Drawing.Size(130,30)
$returnStatus.BackColor = "Transparent"
$returnStatus.Text = ""
$objForm.Controls.Add($returnStatus)

# action item here - you could add your own actions
$button_click =
{

$returnStatus.Text = ""
$objStatusBar.Text = "Checking status..."
$computerName = $objTextbox.Text

# output - online
if (Test-Connection $computerName -quiet -Count 2){
Write-Host -ForegroundColor Green "$computerName is online"
$returnStatus.BackColor = "Transparent"
$returnStatus.ForeColor = "lime"
$returnStatus.Text = "Status: Online"
}
Else{
# output - offline
Write-Host -ForegroundColor Red "$computerName is offline"
$returnStatus.ForeColor= "Red"
$returnStatus.Text = "Status: Offline"
}

$objStatusBar.Text = "Done"

}

# form status bar
$objStatusBar = New-Object System.Windows.Forms.StatusBar
$objStatusBar.Name = "statusBar"
$objStatusBar.Text = "Ready"
$objForm.Controls.Add($objStatusBar)

$objForm.Add_KeyDown({if ($_.KeyCode -eq "Enter"){& $button_click}})
$objForm.Add_KeyDown({if ($_.KeyCode -eq "Escape")
{$objForm.Close()}})

# modal
$objForm.Topmost = $True
$objForm.Add_Shown({$objForm.Activate()})
[void] $objForm.ShowDialog()

PowerShell – Search for Pattern in Multiple Files; Pattern

email me

This will search for a keyword, number, or string of characters in multiple files, and return the ‘whole’ line to an output file. For example, let’s say you have a 100 text files located in a ‘Config’ folder. And, those files contain many different wireless configurations, but you only want to return lines with the SSID of skytrap. This will do that. This will return the lines that contain the keyword skytrap, and tell you which file the keyword was found in.

clear-host

# Set variables
$searchTerm = "skytrap"
$searchDate = "10/10/2018"
$searchFolderPath = "C:\PowerShell\Config"
$outputPath = "C:\PowerShell"
$output = @()

# Folder path to search
$filePath = get-childitem -path "$searchFolderPath"

# Search all files in folder path

$filePath | Where CreationTime -gt $searchDate | Sort CreationTime -Descending | %{
$file = $_.fullname
$output += select-string $file -pattern $searchTerm | %{$_.Line + ": $file"}
}

# Output to text file
$output | out-file "$outputPath\_output.txt"

# Done
Write-host "Done!"

# Open output
notepad "$outputPath\_output.txt"


Output


Notes

Select-String

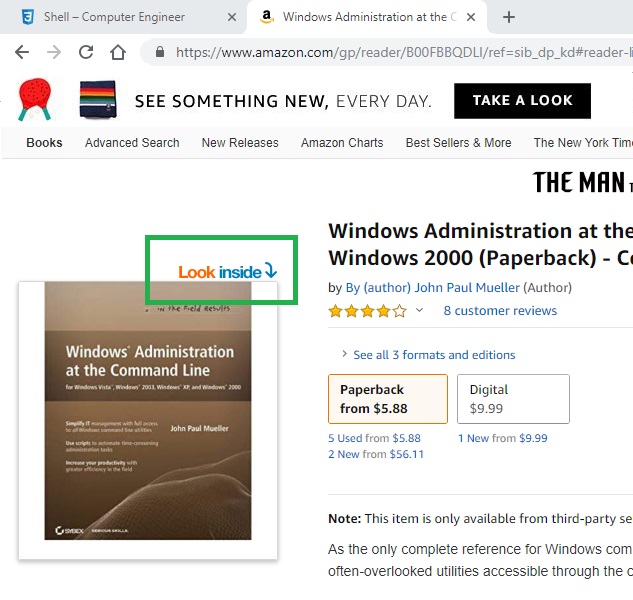
Amazon – Open Directly To ‘Look Inside’

email me

I’ve always loved Amazon’s Look Inside book feature,  where you can review some of the book’s content before purchasing it.

Example


Something you may not know, is that if you wanted to add a link to your website….and launch directly to the opened book, you can. It’s quite a simple trick, really.

First, you find the book on Amazon, and note this part of the URL address in bold:

https://www.amazon.com/Windows-Administration-Command-Vista-Paperback/dp/B00FBBQDLI


Second, on your website, you add the following URL as a hyperlink (note the part in bold):

https://www.amazon.com/gp/reader/B00FBBQDLI/ref=sib_dp_kd#reader-link


This works, because you’re using the book’s Amazon ID, with the URL reader-link action. I found this when reviewing the code on one of the Amazon pages.

Here, take a look at a working link:

Windows Administration at the Command Line for Windows Vista, Windows 2003, Windows XP, and Windows 2000 (Paperback)


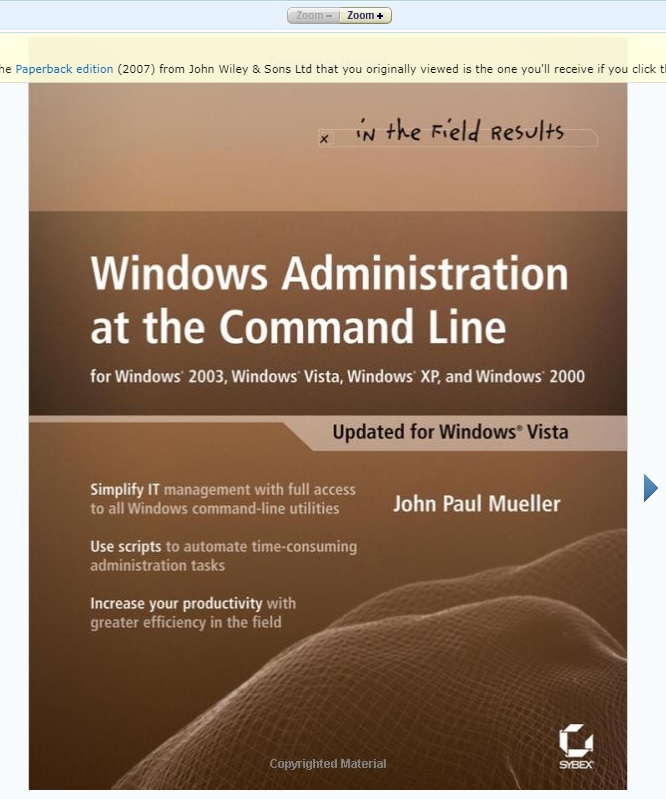
And, if you wanted to add the book cover:


This is such a great way to recommend books at your site. I’m hoping you find this useful, and maybe try it yourself.  The only caveat is…the book in question must actually have the ability to be reviewed; not all books do.

Adobe Creative Cloud – 4.7.0.400 – Install & Uninstall

email me

New Creative Cloud app is available here:

http://ccmdl.adobe.com/AdobeProducts/KCCC/1/win32/ACCCx4_7_0_400.zip


Silent Install

Use a set-up.exe from a previous version to get around the initial Cloud setup.

set-up.exe –silent –ADOBEINSTALLDIR=”C:\Program Files (x86)\Adobe\CreativeCloud” –INSTALLLANGUAGE=en_GB


Silent Uninstall

Found the silent option inside the EXE…

“C:\Program Files (x86)\Adobe\Adobe Creative Cloud\Utils\Creative Cloud Uninstaller.exe” -u


Screenshot


Notes

Check out the -pid parameter

https://helpx.adobe.com/download-install/kb/creative-cloud-desktop-app-download.html


PowerShell – Balloon Tip – Toast

email me

Updated 2/8/2019

If you’re just looking to do basic things with toasts, read up on BurntToast. It makes using toasts much easier.

https://github.com/Windos/BurntToast/blob/master/Installer/BurntToast.msi

Install-Module -Name BurntToast
Import-module BurntToast

Simple Toast

$hdrText = New-BTText -Content 'Eddie''s Website'
$subText = New-BTText -Content 'Click to open the site.'
$aBinding = New-BTBinding -Children $hdrText, $subText
$aVisual = New-BTVisual -BindingGeneric $aBinding
$aContent = New-BTContent -Visual $aVisual -Launch 'https://eddiejackson.net' -ActivationType Protocol
Submit-BTNotification -Content $aContent


Moving on…

Simple Toast with Balloon

[void] [System.Reflection.Assembly]::LoadWithPartialName(“System.Windows.Forms”)

# Remove and Unregister events if created earlier. Tip, remove the events you haven’t created earlier

#Remove-Event BalloonClicked_event -ea SilentlyContinue

#Unregister-Event -SourceIdentifier BalloonClicked_event -ea silentlycontinue

#Remove-Event BalloonClosed_event -ea SilentlyContinue

#Unregister-Event -SourceIdentifier BalloonClosed_event -ea silentlycontinue

Remove-Event Clicked_event -ea SilentlyContinue

Unregister-Event -SourceIdentifier Clicked_event -ea silentlycontinue

# Create the object and customize the message

$objNotifyIcon = New-Object System.Windows.Forms.NotifyIcon

$objNotifyIcon.Icon = [System.Drawing.SystemIcons]::Information

$objNotifyIcon.BalloonTipIcon = “Info”

$objNotifyIcon.BalloonTipTitle = “Technology Notification”

$objNotifyIcon.BalloonTipText = “Google Plugin was installed! ” + [DateTime]::Now.ToShortTimeString()

$objNotifyIcon.Text = “Technology Notification”

$objNotifyIcon.Visible = $True

Register-ObjectEvent -InputObject $objNotifyIcon -EventName Click -SourceIdentifier Clicked_event -Action {

[System.Windows.MessageBox]::Show('Hello')
$objNotifyIcon.Visible = $False

#[System.Windows.Forms.MessageBox]::Show(“Clicked”,”Information”);$objNotifyIcon.Visible = $False

} | Out-Null

# Show Notification

$objNotifyIcon.ShowBalloonTip(1000)


More Advanced Toast (yes, this is the toast you’re looking for)

The PowerShell file below is a toast with a base64 image, and two buttons with action items. You can either convert an image to base64 (and the image be embedded into the script), or just point to an image (you’ll probably want to package any extra resource files you use).

Toast1.ps1

more at Microsoft…


App on Computer

To add an app or an installation file action to a toast button (where the app resides on the computer), simply apply CLASSES_ROOT registry keys before you run the toast. This is to meet some basic security requirements which allow toasts to access files on the local machine. Toasts don’t normally have access to the files on your computer; this is by design.

Reg Keys (save as toast.reg)

Windows Registry Editor Version 5.00

[HKEY_CLASSES_ROOT\YourApp]
@=”myProto Protocol”
“URL Protocol”=””

[HKEY_CLASSES_ROOT\YourApp\DefaultIcon]
@=”C:\\setup\\setup.exe,1″

[HKEY_CLASSES_ROOT\YourApp\shell]

[HKEY_CLASSES_ROOT\YourApp\shell\open]

[HKEY_CLASSES_ROOT\YourApp\shell\open\command]
@=”\”c:\\setup\\setup.exe\””

Now place the App Reference Name into the XML of the toast, as the argument (with the colon).

<action content=”Install” activationType=”protocol” arguments=”YourApp:“>

—test your toast now


Older Post

This launches a balloon notification. Tested in W7 and W10.
Some details of the process…
First, you need to load up an assembly to take advantage of a method that will help to extract the icon image from the file.

Add-Type -AssemblyName System.Windows.Forms


Second, you need to add the System.Windows.Forms assembly into your PowerShell session, before we can make use of the NotifyIcon class. Your function checks whether there is already an icon that you can reuse.  This is done by using a “shared variable”, which is a variable that has “script:” scope. Shared variables will be active as long as the script is running.

if ($script:balloon -eq $null)
{
$script:balloon = New-Object System.Windows.Forms.NotifyIcon
}


Then you want to set the system tray icon of the PowerShell ISE by locating its path via Get-Process and accessing the Path property. After you have the path, then you need to extract the icon from the file so it can be applied to the Icon property. Using this approach, you can pull any icon from a file and use it for the system tray icon when the balloon tip is launched.

The Get-Process -id $pid command returns the PowerShell process that is hosting the current session.The ExpandProperty expands the collections, which will output the properties of every object in the collection. In this case, it’s the path to “C:\windows\system32\WindowsPowerShell\v1.0\PowerShell_ISE.exe”

$path = Get-Process -id $pid | Select-Object -ExpandProperty Path


The ExtractAssociatedIcon includes the System.Drawing.Icon class and accepts the parameter of string path name.

$balloon.Icon = [System.Drawing.Icon]::ExtractAssociatedIcon($path)


Okay, moving on to the full function…


The Function

function BalloonTip
{

[CmdletBinding()]
param
(
[Parameter(Position=1)]
$text,

[Parameter(Position=2)]
$title,

[Parameter(Position=3)]
$icon
)

Add-Type -AssemblyName System.Windows.Forms

$iconParam = $Icon

if ($script:balloon -eq $null)
{

$script:balloon = New-Object System.Windows.Forms.NotifyIcon
}

$path = Get-Process -id $pid | Select-Object -ExpandProperty Path
$balloon.Icon = [System.Drawing.Icon]::ExtractAssociatedIcon($path)
$balloon.BalloonTipIcon = $iconParam
$balloon.BalloonTipText = $text
$balloon.BalloonTipTitle = $title
$balloon.Visible = $true

$balloon.ShowBalloonTip(2000)
}

BalloonTip "Your computer has received updates. Please reboot. - IT Department" "UPDATES" "Warning"
# none - Info - Error - Warning


Screenshots

W7

W10


Notes

Encoding/Decoding a Text File

clear-host

# Encode

$File1 = "c:\setup\YourFile.txt"

$Content1 = get-content $File1
$Bytes = [System.Text.Encoding]::UTF8.GetBytes($Content1)
$Encoded = [System.Convert]::ToBase64String($Bytes)
#$Encoded | set-content ($File1 + ".b64")
Write-Host "ENCODED: " $Encoded

# Decode
[System.Text.Encoding]::ASCII.GetString([System.Convert]::FromBase64String($Encoded)) | Out-File -Encoding "ASCII" c:\setup\YourFileDecoded.txt
$Content2 = get-content c:\setup\YourFileDecoded.txt
Write-Host "DECODED: " $Content2


Decoding an Image

# tmp image name
$Image = "$env:TEMP\Image.png"

# convert from base64
[byte[]]$Bytes = [convert]::FromBase64String($bas64Image)
[System.IO.File]::WriteAllBytes($Image,$Bytes)


Encoding/Decoding an EXE

clear-host

# Encode

$FilePath = "c:\setup\NoSleep.exe"
$File = [System.IO.File]::ReadAllBytes($FilePath);

# returns the base64 string
$Base64String = [System.Convert]::ToBase64String($File);

# Decode

function Convert-StringToBinary {
[CmdletBinding()]
param (
[string] $EncodedString
, [string] $FilePath = (‘{0}\{1}’ -f $env:TEMP, [System.Guid]::NewGuid().ToString())
)

try {
if ($EncodedString.Length -ge 1) {

# decodes the base64 string
$ByteArray = [System.Convert]::FromBase64String($EncodedString);
[System.IO.File]::WriteAllBytes($FilePath, $ByteArray);
}
}
catch {
}

Write-Output -InputObject (Get-Item -Path $FilePath);
}

$DecodedFile = Convert-StringToBinary -EncodedString $Base64String -FilePath C:\setup\NoSleep2.exe;


More info…

IO.File ReadAllBytes:

$base64string = [Convert]::ToBase64String([IO.File]::ReadAllBytes($FileName))

and WriteAllBytes to decode:

[IO.File]::WriteAllBytes($FileName, [Convert]::FromBase64String($base64string))


https://github.com/Windos/BurntToast/issues/22

https://docs.microsoft.com/en-us/previous-versions/windows/internet-explorer/ie-developer/platform-apis/aa767914(v=vs.85)


SCCM – Query for Windows 10 by Build Numbers

email me

In SCCM Console > Monitoring > Queries, Copy/paste this as a new query.

select distinct SMS_R_System.Active,
SMS_R_System.NetbiosName,
SMS_G_System_OPERATING_SYSTEM.InstallDate,
SMS_R_System.ADSiteName,
SMS_R_System.ResourceDomainORWorkgroup,
SMS_G_System_OPERATING_SYSTEM.BuildNumber,
SMS_G_System_CH_ClientSummary.LastMPServerName from&nbsp; SMS_R_System
inner join SMS_G_System_OPERATING_SYSTEM on SMS_G_System_OPERATING_SYSTEM.ResourceID
= SMS_R_System.ResourceId
inner join SMS_G_System_CH_ClientSummary on SMS_G_System_CH_ClientSummary.ResourceID
= SMS_R_System.ResourceId where SMS_G_System_OPERATING_SYSTEM.BuildNumber like "%16299%"
or SMS_G_System_OPERATING_SYSTEM.BuildNumber like "%17134%"
or SMS_G_System_OPERATING_SYSTEM.BuildNumber like "%15063%"
or SMS_G_System_OPERATING_SYSTEM.BuildNumber like "%14393%"
or SMS_G_System_OPERATING_SYSTEM.BuildNumber like "%10240%"
or SMS_G_System_OPERATING_SYSTEM.BuildNumber like "%10586%"

AI – PowerShell – Toying With Removing Hyperlinks

email me
clear-host

$string1 = '<a href="https://eddiejackson.net/this_is_a_test.jpg" rel="lightbox noopener" target="_blank"><img class="TEST" src="https://eddiejackson.net/this_is_a_test.jpg" width="264" height="198"></a>'
$string2 = '<a href="https://eddiejackson.net/this_is_a_test.jpg" rel="lightbox noopener" target="_blank"><strong></strong></a>

<a href="https://eddiejackson.net/this_is_a_test.jpg" rel="lightbox noopener" target="_blank">This is a test

</a><a href="https://eddiejackson.net/this_is_a_test.jpg" rel="lightbox noopener" target="_blank"><strong></strong></a>'
$string3 = '<a href="https://eddiejackson.net/this_is_a_test.jpg" rel="lightbox noopener" target="_blank"><img class="TEST" src="https://eddiejackson.net/this_is_a_test.jpg" width="264" height="198"></a>'
$string4 = '<a href="https://eddiejackson.net/this_is_a_test.jpg" rel="lightbox noopener" target="_blank"><strong></strong></a>

<a href="https://eddiejackson.net/this_is_a_test.jpg" rel="lightbox noopener" target="_blank">This is a test

</a><a href="https://eddiejackson.net/this_is_a_test.jpg" rel="lightbox noopener" target="_blank"><strong></strong></a>'

write-host "{{{ REMOVE HYPERLINKS FROM STRING }}}"
write-host ""
write-host ""

# NOT A BEST USE OF REGEX

write-host "INPUT1"
$string1
$a = $string1 -replace "<([^>]*)(?:a href|:\w+)=(?:'[^']*'|""[^""]*""|[^\s>]+)([^>]*)>","`$1`$2"
# using the -replace - not optimal
$b = $a -replace "",""
$c = $b -replace 'rel="lightbox"',""
$d = $c -replace 'rel="noopener noreferrer"',""
$e = $d -replace 'target="_blank"',""
$f = $e -replace 'target="_parent"',""
$g = $f -replace 'target="_top"',""
$h = $g -replace 'target="_new"',""
$i = $h -replace 'rel="noopener noreferrer"',""
write-host ""
Write-host "OUTPUT1: RETURNS JUST IMG SRC"
$i
write-host "`n`n"

# GETTING WARMER WITH THESE

Write-host "INPUT2"
$string2
write-host ""
Write-host "OUTPUT2: RETURNS EVERYTHING BUT URL"
$x = $string2 -replace "<([^>]*)(?:a href|:\w+)=(?:'[^']*'|""[^""]*""|[^\s>]+)([^>]*)>",""
$y = $x -replace "",''
$y

write-host "`n`n"

Write-host "INPUT3"
$string3
write-host ""
Write-host "OUTPUT3: RETURNS EVERYTHING BUT URL"
$x = $string4 -replace ("<([^>]*)(?:a href|:\w+)=(?:'[^']*'|""[^""]*""|[^\s>]+)([^>]*)>",""); $y = $x -replace "",""
$y

write-host "`n`n"

# THIS IS THE BEST USAGE OF REGEX

Write-host "INPUT4"
$string4
write-host ""
Write-host "OUTPUT4: RETURNS EVERYTHING BUT URL"
$x = $string4 -replace "<([^>]*)(?:a href|:\w+)=(?:'[^']*'|""[^""]*""|[^\s>]+)([^>]*)>|(",""
$x
write-host "`n`n"

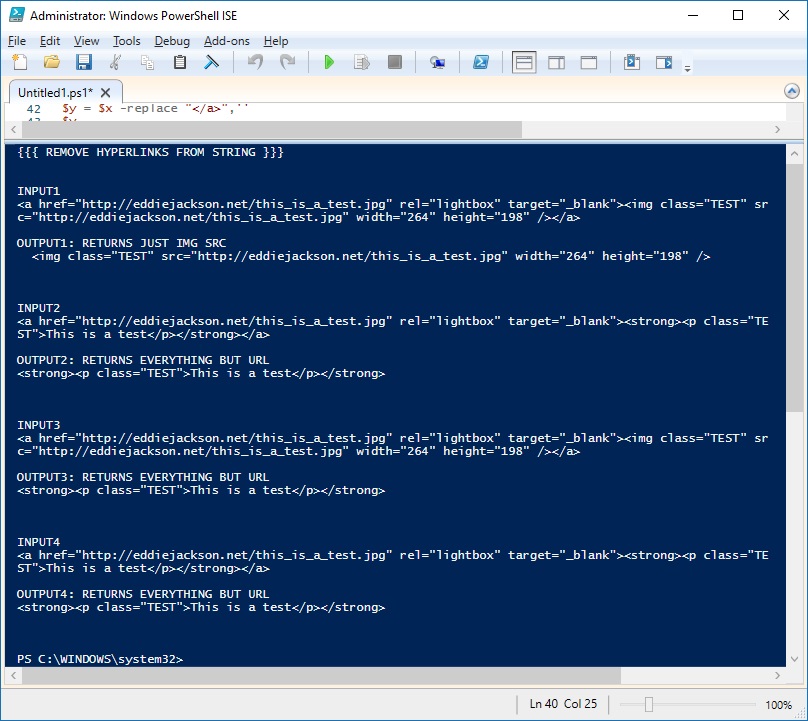
Screenshot

PowerShell – Check Password Complexity

email me

clear-host

$Password = Read-Host "{{ PASSWORD COMPLEXITY VERIFICATION }}`n`nPassword must meet these requirements:
`n`nAt least one upper case letter [A-Z]`nAt least one lower case letter [a-z]`nAt least one number [0-9]`nAt least one special character (!,@,%,^,&amp;,$,_)`nPassword length must be 7 to 25 characters.`n`n`nEnter Password"

if(($Password -cmatch '[a-z]') -and ($Password -cmatch '[A-Z]') -and ($Password -match '\d') -and ($Password.length -match '^([7-9]|[1][0-9]|[2][0-5])$') -and ($Password -match '!|@|#|%|^|&amp;|$|_'))
{
Write-Host "`nPassword is valid!`n"
}
else
{
Write-Host "`nPassword is invalid!`n"
}


Notes

clear-host

$RegEx = @”
^((?=.*[a-z])(?=.*[A-Z])(?=.*\d)|(?=.*[a-z])(?=.*[A-Z])(?=.*[^A-Za-z0-9])|(?=.*[a-z])(?=.*\d)(?=.*[^A-Za-z0-9])|(?=.*[A-Z])(?=.*\d)(?=.*[^A-Za-z0-9]))([A-Za-z\d@#$%^&amp;amp;£*\-_+=[\]{}|\\:’,?/`~”();!]|\.(?!@)){8,16}$
“@

"Wo0@12345678" -cmatch $RegExp