![]()
Step 1: Connect external hard drive.
Step 2: Open elevated Command Prompt.
Step 3: When the Command Prompt opens, enter the following command:
DISKPART and press enter.
LIST DISK and press enter.
Once you enter the LIST DISK command, it will show the disk number of your external hard drive. Note disk 1 (this should be your external drive). The primary hard disk should be disk 0.
Step 4:
SELECT DISK 1
CLEAN
CREATE PARTITION PRIMARY
SELECT PARTITION 1
ACTIVE
FORMAT FS=NTFS QUICK
ASSIGN
EXIT
* Leave the Command Prompt window open
Step 5: Insert the Windows DVD.
Step 6: Go back to the Command Prompt
type D: (where “D” is the DVD drive letter)
type CD BOOT and press enter.
type BOOTSECT.EXE /NT60 H: and press enter (where “H” is the external USB hard drive letter)
* remove the Windows DVD.
Step 7:
Now, exit the Command Prompt.
Plugin the Master USB flash drive, which will contain boot, efi, sources, AnyWims.wim, Tools, and other boot files and folders (such as the BOOTMGR).
Note, you may have all the files stored on a network share—-just copy them from the share to the external hard drive.
Also, you may need to unhide any hidden files on the Master USB flash drive to copy over Bootmgr and other boot files and folders.
Copy the contents of the Master USB flash drive over to the external drive.
* Note, if you don’t have a Master USB, make sure the root of your USB drive looks like this (these files and folders can be obtained from the Win 7 DVD):
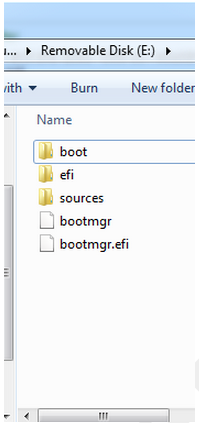
AND…make sure you copy your customized boot.wim into the sources folder—if you have one.
Step 8:
Test external hard drive by rebooting and selecting Boot from USB hard drive.