SCCM – View SMS Classes in SCCM Console

email me

There is a great way to view the general info and properties of a class in the SCCM Console—you start the console in debug view, and you’ll be able to see all the available WMI classes. Very cool!

Add sms:debugview to console shortcut

Open console and select Tools

Select Namespaces

Select a class you’d like to review

Click Show Details

Click through tabs


Notes

You can also run SQL queries directly from this view as well, and view instances of the returned results.

Lastly, you’ll now have the ability to view any object’s details. For example, select any object (a device, a user, a container, etc.), right-click, and there will be a Show Object Details option.

Once you click the new option, the object details will appear


Command line Options

Option Description
/sms:debugview=1 A DebugView is included in all ResultViews that specify a view. DebugView shows raw properties (names and values).
sms:NamespaceView=1 Shows namespace view in the System Center Configuration Manager console.
/sms:ResetSettings The System Center Configuration Manager console ignores user persisted connection and view states (Microsoft Management Console window size is not reset).
/sms:IgnoreExtensions Disables any System Center Configuration Manager extensions.
/sms:NoRestore The System Center Configuration Manager console ignores previous persisted node navigation.


Reference

https://msdn.microsoft.com/library/hh458093.aspx

https://msdn.microsoft.com/en-us/library/cc144901.aspx

https://sccmguy.com/2012/04/18/sccm-2012-debug-mode/

SCCM – SQL – Edit SMS Query in CM Database – Hung Query

email me

So, when I was creating and testing a new query in SCCM, I noticed I could no longer click the properties of my query (what’s up with that, Microsoft?). It was due to a syntactical error in the query, which, normally, the query just won’t run, but properties work just fine.

Strangely, there was no way to get around this problem in the console. My query was hung. At first, I thought it was just a record lock issue, but…it wasn’t. Upon further investigation, I realized I should try to modify the query directly in the DB. Once I found where the queries were located in the DB, I updated my query, and tested. That worked!

Here is how you do it:

1 – Open SQL Server Management Studio
2 – Click on the CM DB
3 – Expand Tables
4 – Right click dbo.queries and edit the top X amount of rows
5 – Find your Query in the WQL column
6 – Edit the query directly
7 – Hit Enter, to save
8 – Test Query in SCCM

Screenshot (click to zoom)

Skype for Desktop – Disable Auto Updates

email me

After installing an older version of Skype for Desktop (in W10), I noticed that Skype was automatically updating to the latest. Well, I don’t want that, Microsoft. End-users won’t have the appropriate permissions to install the update. So, they are getting prompted to do an installation that they cannot complete; Microsoft, just no.

I looked around for a way to disable it, some kind of reg setting, group policy, or config file. I had no luck (note, there are methods for disabling auto updates using Skype for Business—the licensed version).

So, I resorted to using ProcMon and WireShark. I found the answer I was looking for.


ProcMon

Using PromMon, I was able to return the setup file name, the Skype installation path, and see where the EXE was being downloaded from (the source).

Skype-Setup.exe

C:\Users\%username%\AppData\Roaming\Microsoft\Skype for Desktop

72.21.81.200


Wireshark

Using Wireshark and the IP address from above, I was able to find the URL in a packet.

endpoint920510.azureedge.net


Solution

The fix was just to add that URL with a redirected IP address into the host file. BAM…no more auto updates and no more update chat notifications.

Add this into the host file:

127.0.0.1           endpoint920510.azureedge.net

PowerShell, if you need to automate it

Add-Content -Path "C:\Windows\system32\drivers\etc\hosts" -Value "`n127.0.0.1 endpoint920510.azureedge.net"


Or, add this to a batch file

powershell.exe -noprofile -command “Add-Content -Path C:\Windows\system32\drivers\etc\hosts -Value “”`n127.0.0.1                endpoint920510.azureedge.net””” -force


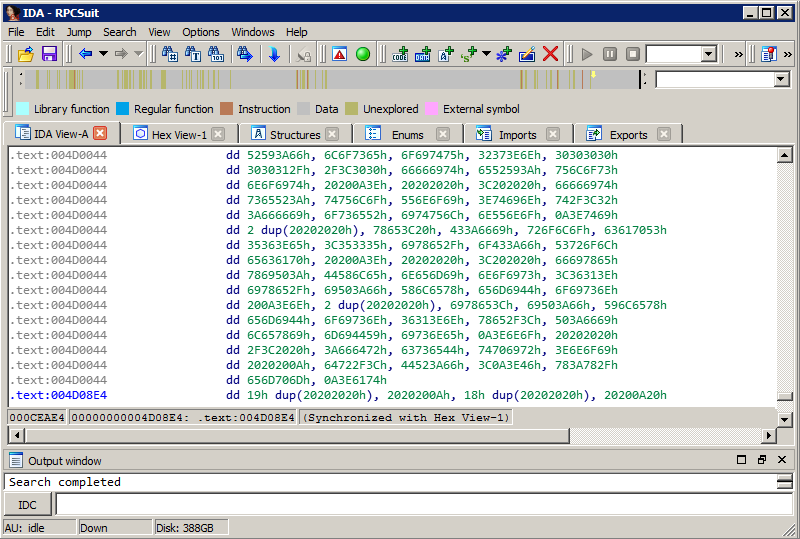
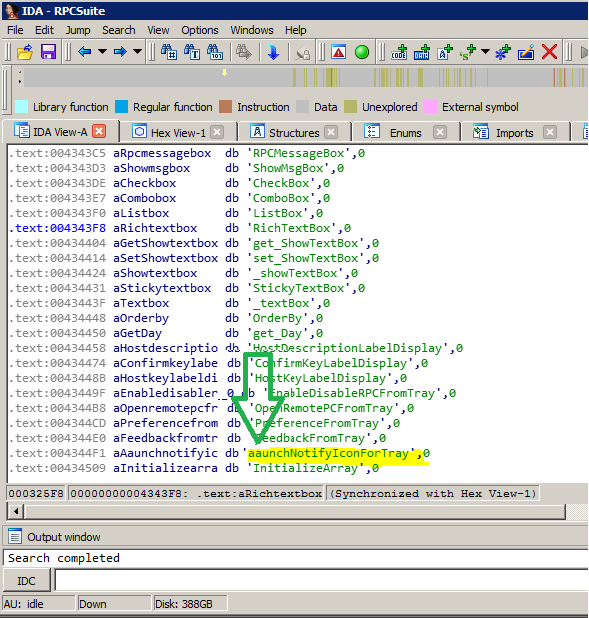
I’ll probably still throw this into a VM, so I can reverse engineer it. I’d like to see if I can add a jump instruction or completely remove the download function using assembly.


Notes

https://skypeapps.azureedge.net


Experimental 

Modify the app.asar file to disable updates. Asar is a simple extensive archive format. It works like tar that concatenates all files together without compression, while having random access support.

C:\Program Files (x86)\Microsoft\Skype for Desktop\resources

Search for this._appConfig.enableUpdates under updatesEnabled()

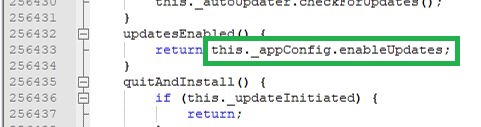
Overwrite (insert) false…and use spaces to overwrite the rest. You’re typing the spaces to not affect the offset of the asar file. If you change the offset, you’ll receive crash errors.

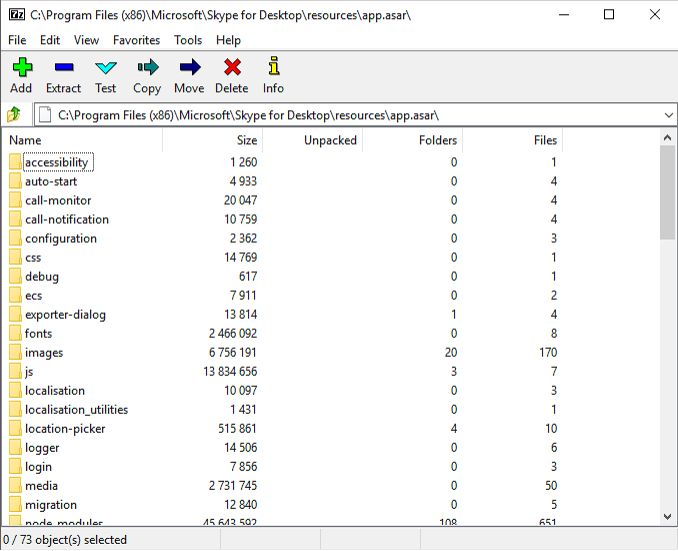
If you want to unpack the asar (and not worry about offsets), and really go exploring, use 7-Zip with plugins from here (or my mirror). To install the plugin into the 7-Zip installation folder, you need to create a Formats subfolder in the main 7-Zip folder.


Other MS IPs

13.92.27.116
13.93.149.41
13.107.2.128
40.114.211.99
52.163.217.227
52.114.32.8
52.162.166.27
52.163.217.227
52.184.153.176
65.55.252.169
93.184.215.201


JSON File

{“app.registerSkypeUri”:true,”main-window.zoom-level”:0,”main-window.isMaximised”:false,”main-window.position”:{“x”:393,”y”:0,”width”:814,”height”:860},”migrations.461655100d0a15b8c1890f74c86b31d211b3d6d0b7c78e46a5e97d41777d99a0.autoAnswerCalls”:true,”migrations.461655100d0a15b8c1890f74c86b31d211b3d6d0b7c78e46a5e97d41777d99a0.autoAnswerCallsWithVideo”:true,”migrations.461655100d0a15b8c1890f74c86b31d211b3d6d0b7c78e46a5e97d41777d99a0.enableChatNotifications”:true,”migrations.461655100d0a15b8c1890f74c86b31d211b3d6d0b7c78e46a5e97d41777d99a0.agcEnabled”:true,”migrations.461655100d0a15b8c1890f74c86b31d211b3d6d0b7c78e46a5e97d41777d99a0.cameraId”:true,”migrations.461655100d0a15b8c1890f74c86b31d211b3d6d0b7c78e46a5e97d41777d99a0.microphoneName”:true,”migrations.461655100d0a15b8c1890f74c86b31d211b3d6d0b7c78e46a5e97d41777d99a0.speakerName”:true,”updates.windows.awaiting-installer-version”:”Skype-8.28.0.41.exe”}

App Shortcuts

“C:\Program Files (x86)\Microsoft\Skype for Desktop\Skype.exe” –type=renderer –ms-disable-indexeddb-transaction-timeout –no-sandbox –service-pipe-token=E569827CBC05E614083B3C706A9E0D50 –lang=en-US –app-user-model-id=Microsoft.Skype.SkypeDesktop –app-path=”C:\Program Files (x86)\Microsoft\Skype for Desktop\resources\app.asar” –node-integration=false –webview-tag=true –no-sandbox –preload=”C:\Program Files (x86)\Microsoft\Skype for Desktop\resources\app.asar\WebViewPreload.js” –guest-instance-id=1 –enable-blink-features –disable-blink-features –context-id=2 –enable-pinch –device-scale-factor=1 –num-raster-threads=2 –enable-main-frame-before-activation –content-image-texture-target=0,0,3553;0,1,3553;0,2,3553;0,3,3553;0,4,3553;0,5,3553;0,6,3553;0,7,3553;0,8,3553;0,9,3553;0,10,3553;0,11,3553;0,12,3553;0,13,3553;0,14,3553;0,15,3553;0,16,3553;0,17,3553;1,0,3553;1,1,3553;1,2,3553;1,3,3553;1,4,3553;1,5,3553;1,6,3553;1,7,3553;1,8,3553;1,9,3553;1,10,3553;1,11,3553;1,12,3553;1,13,3553;1,14,3553;1,15,3553;1,16,3553;1,17,3553;2,0,3553;2,1,3553;2,2,3553;2,3,3553;2,4,3553;2,5,3553;2,6,3553;2,7,3553;2,8,3553;2,9,3553;2,10,3553;2,11,3553;2,12,3553;2,13,3553;2,14,3553;2,15,3553;2,16,3553;2,17,3553;3,0,3553;3,1,3553;3,2,3553;3,3,3553;3,4,3553;3,5,3553;3,6,3553;3,7,3553;3,8,3553;3,9,3553;3,10,3553;3,11,3553;3,12,3553;3,13,3553;3,14,3553;3,15,3553;3,16,3553;3,17,3553;4,0,3553;4,1,3553;4,2,3553;4,3,3553;4,4,3553;4,5,3553;4,6,3553;4,7,3553;4,8,3553;4,9,3553;4,10,3553;4,11,3553;4,12,3553;4,13,3553;4,14,3553;4,15,3553;4,16,3553;4,17,3553 –enable-gpu-async-worker-context –service-request-channel-token=E569827CBC05E614083B3C706A9E0D50 –renderer-client-id=9 –mojo-platform-channel-handle=2984 /prefetch:1

=renderer –ms-disable-indexeddb-transaction-timeout –no-sandbox –service-pipe-token=B303D2EA9221E03BA023FA86AED6494B –lang=en-US –app-user-model-id=Microsoft.Skype.SkypeDesktop –app-path=”C:\Program Files (x86)\Microsoft\Skype for Desktop\resources\app.asar” –node-integration=false –webview-tag=true –no-sandbox –preload=”C:\Program Files (x86)\Microsoft\Skype for Desktop\resources\app.asar\Preload.js” –context-id=2 –enable-pinch –device-scale-factor=1 –num-raster-threads=2 –enable-main-frame-before-activation –content-image-texture-target=0,0,3553;0,1,3553;0,2,3553;0,3,3553;0,4,3553;0,5,3553;0,6,3553;0,7,3553;0,8,3553;0,9,3553;0,10,3553;0,11,3553;0,12,3553;0,13,3553;0,14,3553;0,15,3553;0,16,3553;0,17,3553;1,0,3553;1,1,3553;1,2,3553;1,3,3553;1,4,3553;1,5,3553;1,6,3553;1,7,3553;1,8,3553;1,9,3553;1,10,3553;1,11,3553;1,12,3553;1,13,3553;1,14,3553;1,15,3553;1,16,3553;1,17,3553;2,0,3553;2,1,3553;2,2,3553;2,3,3553;2,4,3553;2,5,3553;2,6,3553;2,7,3553;2,8,3553;2,9,3553;2,10,3553;2,11,3553;2,12,3553;2,13,3553;2,14,3553;2,15,3553;2,16,3553;2,17,3553;3,0,3553;3,1,3553;3,2,3553;3,3,3553;3,4,3553;3,5,3553;3,6,3553;3,7,3553;3,8,3553;3,9,3553;3,10,3553;3,11,3553;3,12,3553;3,13,3553;3,14,3553;3,15,3553;3,16,3553;3,17,3553;4,0,3553;4,1,3553;4,2,3553;4,3,3553;4,4,3553;4,5,3553;4,6,3553;4,7,3553;4,8,3553;4,9,3553;4,10,3553;4,11,3553;4,12,3553;4,13,3553;4,14,3553;4,15,3553;4,16,3553;4,17,3553 –enable-gpu-async-worker-context –service-request-channel-token=B303D2EA9221E03BA023FA86AED6494B –renderer-client-id=4 –mojo-platform-channel-handle=2396 /prefetch:1
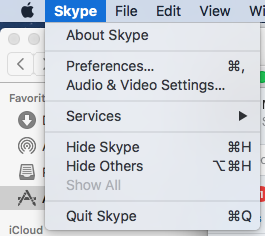
 

Mac

Download Skype for Mac

Disable Updates in Mac asar (found in the .app > Contents > Resources > app.asar)

Change from enableUpdates: true (with that space) to enableUpdates:false (no space with false)

Goes from this

To this

Windows 10 – Install APPX Files

email me

Find PowerShell in the Start menu, right-click on it, and then select the option “Run as Administrator”

Navigate to the appx file location using the below command. Replace c:\path_to_appx\directory with the directory path to the .appx file.

cd c:\path_to_appx\directory


After navigating to the directory, use this command to install the .appx file. Replace “file.appx” with the appx file name.

Add-AppxPackage “.\file.appx”

Or

Add-AppxPackage -Path “.\file.appx”


When you execute the command, the app will install (normally quite quickly). You will not receive any confirmation message in the PowerShell window. You will be able to search for the installed app on the Start Menu.


Notes

To extract packages from a bundle
MakeAppx unbundle /p bundle_name.appxbundle /d output_directory
* C:\Program Files (x86)\Windows Kits\10\App Certification Kit\makeappx.exe

Screenshot (click to zoom)

Unpack files from appx
MakeAppx unpack /p file.appx /d output_directory
* C:\Program Files (x86)\Windows Kits\10\App Certification Kit\makeappx.exe

Install extracted/unpackaged app
Add-AppxPackage -DisableDevelopmentMode -Register “.\AppxManifest.xml”


App Repository

C:\ProgramData\Microsoft\Windows\AppRepository

C:\Windows\SystemApps

C:\Users\%username%\AppData\Local\Microsoft\Windows\Application Shortcuts

C:\Users\%username%\AppData\Local\Microsoft\WindowsApps

https://docs.microsoft.com/en-us/windows/desktop/appxpkg/make-appx-package–makeappx-exe-

VBScript – Scan and Replace a String in Text File

email me

I’m using this to do a simple setting replacement in a config file. It won’t matter which line it is on, and…it won’t matter if you only know part of the string.

'Option Explicit
On error resume next

dim objFSO, strFolder, strFilePath, tmpFile, strLineInput, Settings

Const ForReading = 1

Const ForWriting = 2

Set objFSO = CreateObject("Scripting.FileSystemObject")

strFolder = "C:\ProgramData\ABC_Program\"

strFilePath = strFolder & "TheFile.ini"

Set Settings = objFSO.OpenTextFile(strFilePath, ForReading, True)

Set tmpFile = objFSO.OpenTextFile(strFilePath & ".tmp", ForWriting, True)

Do While Not Settings.AtEndofStream

strLineInput = Settings.ReadLine

If InStr(strLineInput, "AutoUpdate=") Then

strLineInput = "AutoUpdate=0"

End If

tmpFile.WriteLine strLineInput

Loop

Settings.Close

tmpFile.Close

objFSO.DeleteFile(strFilePath)

objFSO.MoveFile strFilePath&".tmp", strFilePath


Notes

on error resume next 

Const ForReading = 1

Const ForWriting = 2

Set objFSO = CreateObject("Scripting.FileSystemObject")

Set objShell = WScript.CreateObject("WScript.Shell")

Set objFile = objFSO.OpenTextFile("C:\IEZoneSettings.reg", ForReading)


strUser = objShell.ExpandEnvironmentStrings("%USERNAME%")

strText = objFile.ReadAll

objFile.Close

strNewText = Replace(strText, "XXXXX", strUser)


Set objFile = objFSO.OpenTextFile("C:\IEZoneSettings.reg", ForWriting)

objFile.WriteLine strNewText

objFile.Close

Java 8 Update 181

email me

Silent Installation

JavaDownload.exe INSTALL_SILENT=1 STATIC=0 AUTO_UPDATE=0 WEB_JAVA=1 WEB_JAVA_SECURITY_LEVEL=H WEB_ANALYTICS=0 EULA=0 REBOOT=0


64 Bit

Version
1.8.1810.13

Size
68.4 MB

Registry
REG.exe ADD “HKLM\SOFTWARE\Microsoft\Windows\CurrentVersion\Uninstall\{26A24AE4-039D-4CA4-87B4-2F64180181F0}” /v “Publisher” /t REG_SZ /d “YourDesktopManagementSoftware—example: SCCM” /f

Uninstall
msiexec /x{26A24AE4-039D-4CA4-87B4-2F64180181F0}


32 Bit

Version
1.8.1810.13

Size
61.5 MB

Registry
REG.exe ADD “HKLM\SOFTWARE\Wow6432Node\Microsoft\Windows\CurrentVersion\Uninstall\{26A24AE4-039D-4CA4-87B4-2F32180181F0}” /v “Publisher” /t REG_SZ /d “YourDesktopManagementSoftware—example: SCCM” /f

Uninstall
msiexec /x{26A24AE4-039D-4CA4-87B4-2F32180181F0}

Hacking/Reverse Engineering – Remove RemotePC Client Side Notify Icon

email me

I mostly refrain from posting my legal hacking exploits, but…the vendor just hasn’t stepped up to add this feature, and I believe it could be useful to other people.

First, what is RemotePC? RemotePC is a remote access solution for consumers and businesses, and is a product of IDrive Inc. RemotePC allows users, businesses and IT professionals to access and control their PCs & Macs remotely from any device including iOS/Android devices.

In RemotePC, there is a support console (back end), and an agent service (front end). The issue I have with the agent service is it can be configured by the end-user. Why would you allow that??? What company on the planet wants their end-users disabling remote support? None.

So, after contacting the vendor, there is no way to remove the notify icon, which contains all the settings (and, apparently, the remote support functionality). Arrrrrg.

This is what end-users see:

What should be on the menu, and should have the ability to be configured remotely, is a hide icon, but it does not exist.

Okay, on to the hacking part. The first thing I normally do when I want to peer into an application, is to load it into IDA. Interactive Disassembler (or IDA) is a disassembler for computer software which generates assembly language source code from machine-executable code (yes, assembly is still around). It supports a variety of executable formats for different processors and operating systems. It also can be used as a debugger for Windows PE, Mac OS X Mach-O, and Linux ELF executables. Reverse engineering requires practice; it is as much of an artform, as it is a science.


In the IDA Console

After opening IDA, I do an overview of all the code.


Then, I search for keywords related to my interest. In this case, it is Tray, Icon, Notify. Look what I’m rewarded with just after a couple of searches…


So, armed with this knowledge, I now want to prevent that particular function from being called, or loaded. How do I do that? By simply changing the name of said function, call handler, or program routine. Note, this doesn’t always work the first time (or the second…or the third); it may take numerous searches and attempts, trying different things, to actually modify the code in a manner that doesn’t crash the application. Reverse engineering may also require other tools to assist you in this process, but that’s another story. Never add or remove bits; just replace, as in overwrite, them (if you change the offset, expect the program to crash).

The minor change made:


UPDATE 12/19/2018

The company has updated the RPCSuite.exe, thus changing the function in the EXE. Search for INotify now (I changed the ‘I’ to an ‘a’):


I did the actual mod in another program called Hex Editor Neo. I just like it better for making changes to files.

And, something to think about, you could have added an assembly JMP instruction, effectively hopping over the LaunchNotifyIconForTray, but that requires knowing how to read assembly and doing a live trace (that is a topic for another time). I learned assembly back in the 90’s, and do still use it from time to time. I chose this simpler method, because almost anyone can do it.


Okay, once that is complete and saved. I run the EXE. The EXE loads just fine, RemotePC works great, and take a look at the icon notification area…no RemotePC notify icon. We did it! We have successfully removed the icon, while maintaining remote support functionality.


Other things I have figured out through reverse engineering

  • Removed the toast notification; added one of my own (Vendor, please add this option).
  • Added an end-user Allow remote support to connect prompt (Vendor…add this feature).
  • Added scan and replace logic to disable AutoUpdates (Would be nice if this was an option).
  • For the RemotePC Viewer, I have added 16 new functions.

* sorry, I will not be posting how did these


Notes


Reverse Engineering, or…Reversing

The process of reverse engineering is accomplished by making use of some tools that are categorized into debuggers or disassemblers, hex editors, monitoring and decompile tools:

  1. Disassemblers – A disassembler is used to convert binary code into assembly code and also used to extract strings, imported and exported functions, libraries etc. The disassemblers convert the machine language into a user-friendly format. There are different dissemblers that specialize in certain things.
  2. Debuggers – This tool expands the functionality of a disassembler by supporting the CPU registers, the hex duping of the program, view of stack etc. Using debuggers, the programmers can set breakpoints and edit the assembly code at run time. Debuggers analyse the binary in a similar way as the disassemblers and allow the reverser to step through the code by running one line at a time to investigate the results.
  3. Hex Editors – These editors allow the binary to be viewed in the editor and change it as per the requirements of the software. There are different types of hex editors available that are used for different functions.
  4. PE and Resource Viewer – The binary code is designed to run on a windows based machine and has a very specific data which tells how to set up and initialize a program. All the programs that run on windows should have a portable executable that supports the DLLs the program needs to borrow from.


Common Tools I use

Windows Defender – Add Exclusion for Adobe Connect

email me

reg add “HKEY_CURRENT_USER\Software\Microsoft\Windows\CurrentVersion\Group Policy Objects\{81EFECC6-6D32-4730-AE00-DA3AB4DBA09A}Machine\Software\Policies\Microsoft\Windows Defender\Exclusions\Processes” /v “C:\Users\%username%\AppData\Roaming\Adobe\Connect\connect.exe” /t REG_SZ /d 0 /f /reg:64

gpupdate


Notes

https://docs.microsoft.com/en-us/windows/security/threat-protection/windows-defender-antivirus/configure-extension-file-exclusions-windows-defender-antivirus


Adobe Creative Cloud ACCCx4_6_0_391 Requires Login

email me

There is a bug in the set-up.exe that requires logging into the cloud to install Creative Cloud. Why, Adobe….just why?

Solution

Taking a different “setup.exe” from an older installer works.


Update 10/10/2018

4_7_0_400, 4.7.0.400 still requires an older set-up.exe to get around the ‘cloud’ requirement during installation.

Notes

“set-up.exe”  –silent –ADOBEINSTALLDIR=”C:\Program Files (x86)\Adobe\CreativeCloud” –INSTALLLANGUAGE=en_GB

http://ccmdl.adobe.com/AdobeProducts/KCCC/1/win32/ACCCx4_6_0_391.zip

https://forums.adobe.com/thread/2519005