![]()
This is the third example of a PowerShell form. In this version, I have added event handling for the ENTER and ESCAPE keys, created a single OK button (rather than Yes No), and have tied the ENTER key event to a Perform Click; it will access the button action $handler_OK_Button_Click. Something else you will notice, the previous example would close immediately once you selected Yes. This form is persistent.
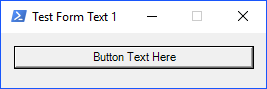
What the form looks like

The Code
# Call Function
CreateForm
function CreateForm {
#Import Assemblies
Add-Type -AssemblyName System.Windows.Forms
Add-Type -AssemblyName System.Drawing
$Form1 = New-Object System.Windows.Forms.Form
$OKButton = New-Object System.Windows.Forms.Button
$InitialFormWindowState = New-Object System.Windows.Forms.FormWindowState
$Label1 = New-Object System.Windows.Forms.Label
$textBox1 = New-Object System.Windows.Forms.TextBox
$Field1 = ""
# Check for ENTER and ESC presses
$Form1.KeyPreview = $True
$Form1.Add_KeyDown({if ($_.KeyCode -eq "Enter")
{
# if enter, perform click
$OKButton.PerformClick()
}
})
$Form1.Add_KeyDown({if ($_.KeyCode -eq "Escape")
{
# if escape, exit
$Form1.Close()
}
})
# The action on the button
$handler_OK_Button_Click=
{
$Field1 = $textBox1.Text
$Field1
# Returns a message of no data
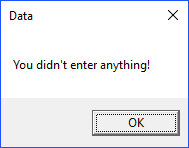
if ($Field1 -eq "") {[System.Windows.Forms.MessageBox]::Show("You didn't enter anything!", "Data")}
# Returns what they types. You could add your code here
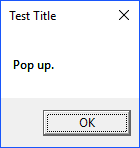
else {[System.Windows.Forms.MessageBox]::Show($Field1, "Data")}
}
$OnLoadForm_StateCorrection=
{
$Form1.WindowState = $InitialFormWindowState
}
# Form Code
$Form1.Name = "Data_Form"
$Form1.Text = "Data Form"
$Form1.MaximizeBox = $false #lock form
$Form1.FormBorderStyle = 'Fixed3D'
# None,FixedDialog,FixedSingle,FixedToolWindow,Sizable,SizableToolWindow
# Icon
$Form1.Icon = [Drawing.Icon]::ExtractAssociatedIcon((Get-Command powershell).Path)
# $NotifyIcon.Icon = [Drawing.Icon]::ExtractAssociatedIcon((Get-Command powershell).Path)
$Form1.DataBindings.DefaultDataSourceUpdateMode = 0
$Form1.StartPosition = "CenterScreen"# moves form to center of screen
$System_Drawing_Size = New-Object System.Drawing.Size
$System_Drawing_Size.Width = 300 # sets X
$System_Drawing_Size.Height = 150 # sets Y
$Form1.ClientSize = $System_Drawing_Size
$OKButton.Name = "OK_Button"
$System_Drawing_Size = New-Object System.Drawing.Size
$System_Drawing_Size.Width = 45
$System_Drawing_Size.Height = 23
$OKButton.Size = $System_Drawing_Size
$OKButton.UseVisualStyleBackColor = $True
$OKButton.Text = "OK"
$System_Drawing_Point = New-Object System.Drawing.Point
$System_Drawing_Point.X = 30
$System_Drawing_Point.Y = 113
$OKButton.Location = $System_Drawing_Point
$OKButton.DataBindings.DefaultDataSourceUpdateMode = 0
$OKButton.add_Click($handler_OK_Button_Click)
$Form1.Controls.Add($OKButton)
$InitialFormWindowState = $Form1.WindowState
$Form1.add_Load($OnLoadForm_StateCorrection)
$Label1.Location = New-Object System.Drawing.Point(10,20)
$Label1.Size = New-Object System.Drawing.Size(280,20)
$Label1.Text = "Enter data here:"
$Form1.Controls.Add($Label1)
$textBox1.TabIndex = 0 # Places cursor in field
$textBox1.Location = New-Object System.Drawing.Point(10,40)
$textBox1.Size = New-Object System.Drawing.Size(260,20)
$Form1.Controls.Add($textBox1)
$Form1.Topmost = $True # Moves form to top and stays on top
$Form1.Add_Shown({$textBox1.Select()})
# Show Form
$Form1.ShowDialog()
}